Welcome to the Scoops & Cones quilt along! We’re making the Scoops & Cones quilt together. This week, we’re putting our blocks together for the quilt finale.
Head over to the introduction post to learn more about the quilt and grab the fabric requirements! For the cutting instructions, Click Here! Click Here for the Ice Cream Cone blocks! For the background block instructions, Click Here! Last week, we made all the background blocks for the quilt. This week, we’re finishing up the quilt for the finale.
Quilt Assembly
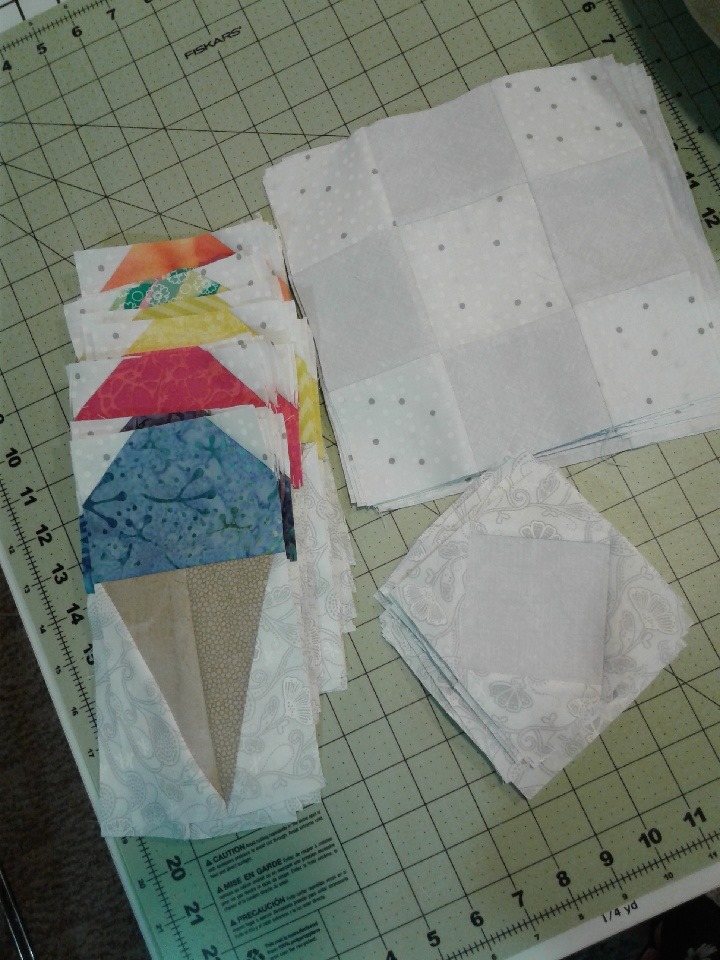
Supplies: (40) Ice Cream Cone blocks (25) Square in a Square blocks (16) Uneven Nine Patches blocks From the Inner Border/Background fabric: (6) 1 ½” x WOF strips From the Outer Border fabric: (6) 3 ½” x WOF strips Batting – 66″ x 66″ at least Backing fabric – 4 yards Binding fabric – 1/2 yard
Center
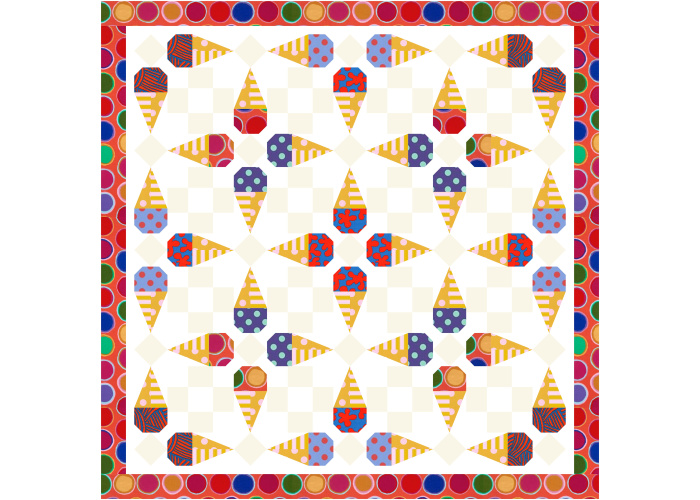
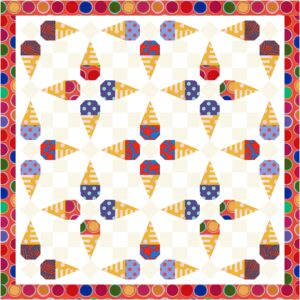
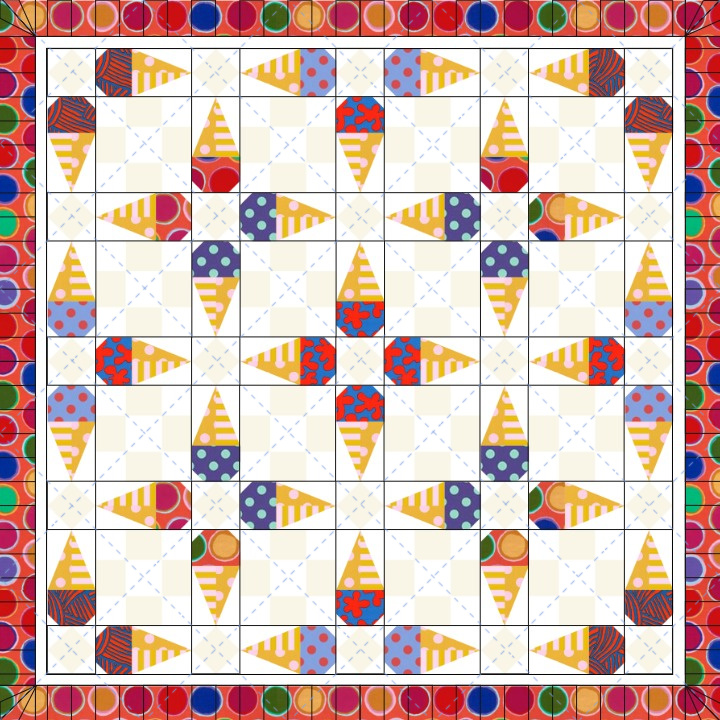
Using the diagram below arrange the Ice Cream Cone, Square in a Square, and Nine Patch blocks in rows as shown below. Sew the blocks into rows, and then sew the rows together.

The quilt center measures 52 1/2″ x 52 1/2″ unfinished.
Inner Border
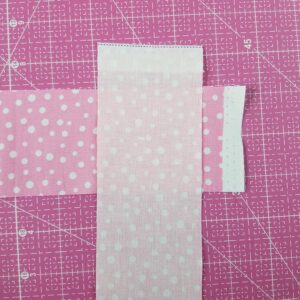
Sew the six background 1 1/2″ x WOF strips together into one long strip with diagonal seams as follows. On a hard workspace, place a strip right side up horizontally with the tail (long ends) pointing towards your non-dominant hand. Lay another strip over the first strip at a 90-degree angle, right sides together, with the tail pointing towards you.
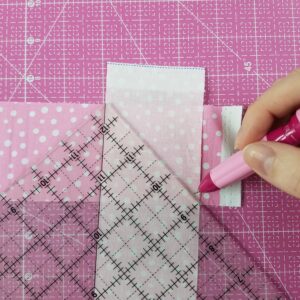
Place a ruler over the strips intersecting at a 45-degree angle as shown below and mark.
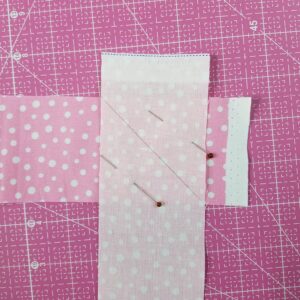
Pin the selvage ends and carefully fold the strip open following the marked line to check that the seam will create a long, continuous strip.
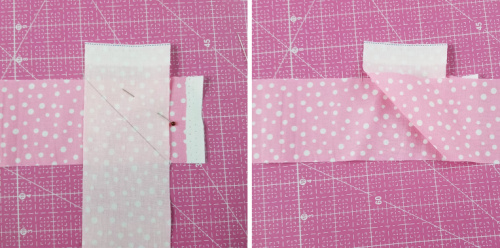
Once you’ve confirmed, replace the top strip over and secure with another pin. Sew on the marked line and trim a 1/4″ seam allowance.
Repeat until all the strips are sewn together. Cut two strips the unfinished size of your quilt center for the side borders: (2) 1 1/2″ x 52 1/2″ strips. Then cut two strips the unfinished size of your quilt center plus 2″ for the top and bottom borders: (2) 1 1/2″ x 54 1/2″ strips. Sew the side borders on first, and then sew on the top and bottom borders.

Quilt center with inner border measures 54 1/2″ x 54 1/2″ unfinished.
Outer Border
Sew together the 3 1/2″ x WOF strips using the same method as used for the inner border. Cut two strips the unfinished size of your quilt center with the inner border for the side borders: (2) 3 1/2″ x 54 1/2″ strips. Then cut two strips the unfinished size of your quilt center with the inner border plus 6″ for the top and bottom borders: (2) 3 1/2″ x 60 1/2″ strips. Sew the side borders on first, and then sew on the top and bottom borders.

Quilt top measures 60 1/2″ x 60 1/2″ unfinished.
Finishing Touches
Cut the backing into two 2 yard segments, trim the selvages and sew together to make the backing. Layer the backing, batting and quilt top and baste using preferred method. Quilt using any design or method you like. We have a few quilting design ideas for you below. 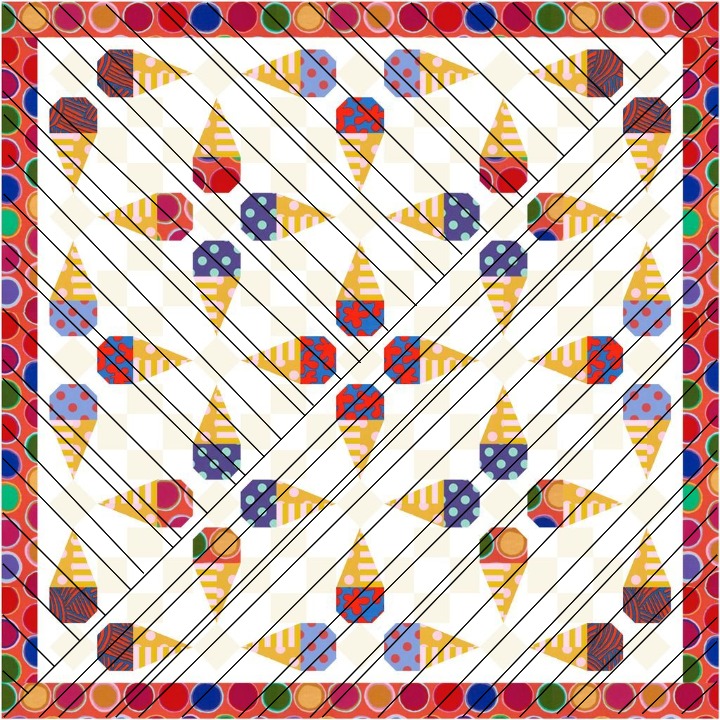
Improvisational straight line quilting is a fun, easy option. Use a walking foot, travel in the excess fabric or along the center quilting line. Play with different colors and weights of threads for different lines. There’s so much to play with in this easy to quilt design!
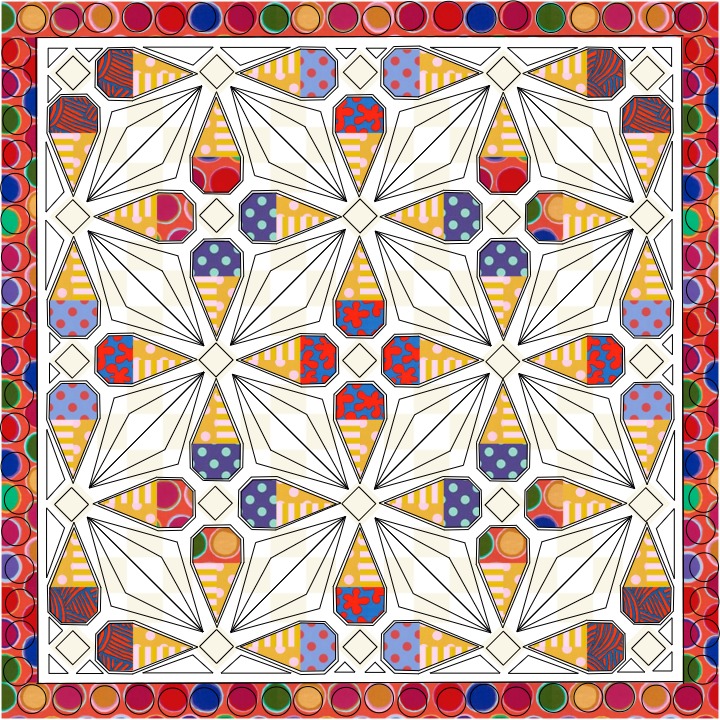
We love some custom quilting, and this quilting design takes advantage of the freedom of free-motion quilting to emphasize unique shapes in the quilt. Stitching in the ditch and quarter inching around the ice cream cones ensures they pop!
Hand quilt or use a combination of machine and hand to achieve this look. Stitch in the ditch in the row seams, then come in and big stitch quilt on point to criss cross the quilt with an accent color. It’s the perfect amount of quilting for cuddling up! Once quilted, trim the edges even and square. Bind using your preferred method. Click Here to review the technique for binding, mitered corners, and joining binding ends.
We all scream for ice cream!
Last week we asked you to share ice cream cone blocks. Everyone shared some scrumptious creations!
And the winner of the giveaway drawing is…
Show off your creations, connect with other quilters, and get inspired!
As you finish your Scoops & Cones, send us the pictures to be included in our monthly Show & Tell. Join us in the AQS Project Parade Facebook Group, piece along with us and post your pictures!
Members get even more…
AQS Members can access hundreds of patterns and digital issues of American Quilter at any time!
Find quilt along series like Forever & A Day, 30 Days of Birds and more.
Not a member? Join today!
Hi, Monna S here. I won a charm pack. Was inquiring on how to get it. Thanks
Hi Monna! We tried contacting you on Facebook with no luck. Please email your shipping information to socialmedia@americanquilter.com and we’ll send your prize right away! -Emily