
Autumn has officially arrived, and to celebrate the season, we’ve put together a quilt along celebrating all the things that go bump in the night.
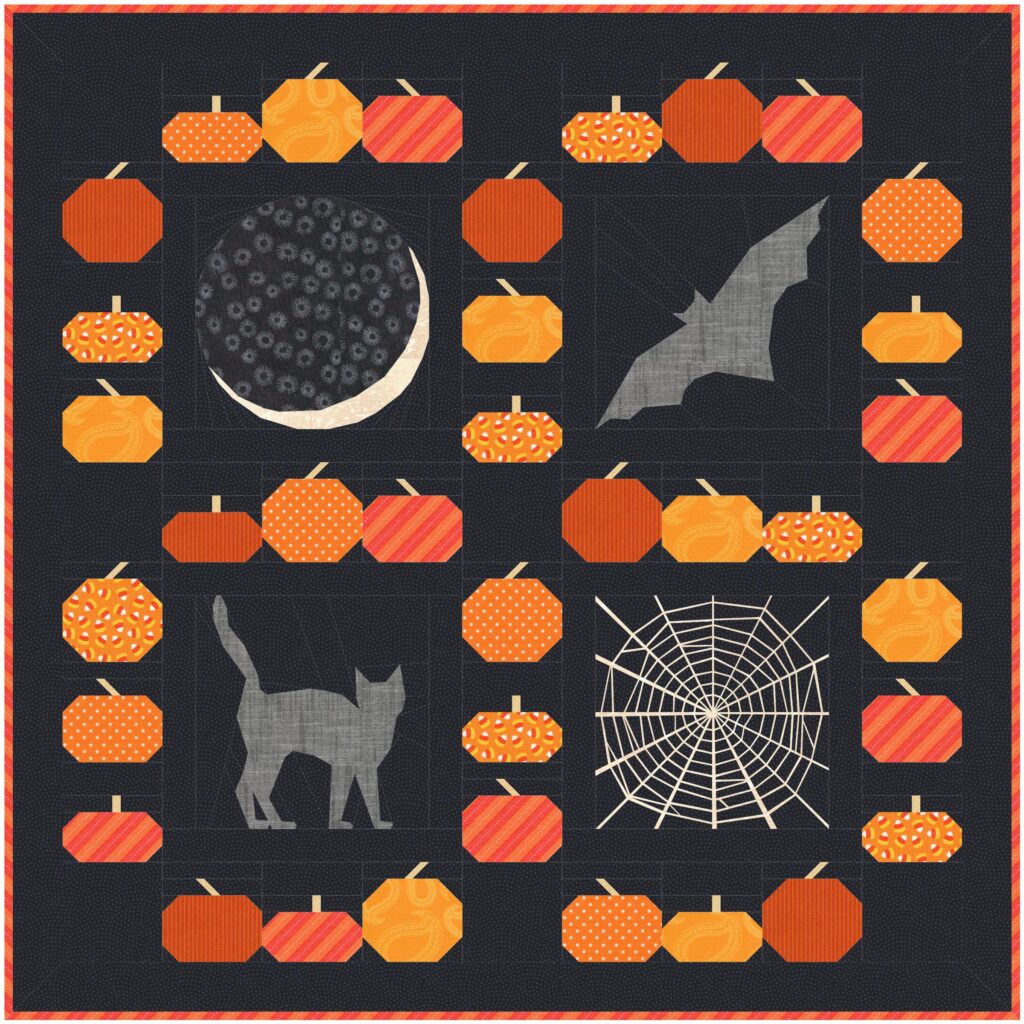
Midnight in the Pumpkin Patch by Emily Cross
30″ x 30″
This week, we’re making the first block: Midnight Moon! To find all the fabric requirements and more information about the quilt along Click Here to go to the main post.

Block 1 – Midnight Moon
9 1/2″ x 9 1/2″ unfinished
Fabric Requirements for Midnight Moon
Background – ¼ yard or Fat Quarter
Shadowed Moon – ¼ yard or 7” square
Illuminated Crescent – ⅛ yard
Cutting Instructions*
*Everyone has their own amount of fabric they like to use when Foundation Paper Piecing. The cutting instructions note in the background fabric which pieces are for the frame around the block, and the rest is use for FPP and are generalities to be used as a guide.
From the background fabric, cut:
(1) 2″ x WOF strip subcut into:
(2) 2″ x 8″ for frame
(2) 2″ x 10″ for frame
(1) 2″ x WOF strip
(1) 1 1/2″ x WOF strip
From the shadowed moon fabric, cut:
(1) 7″ x 7″
From the illuminated crescent fabric, cut:
(1) 4 1/2″ x WOF strip
FPP Assembly
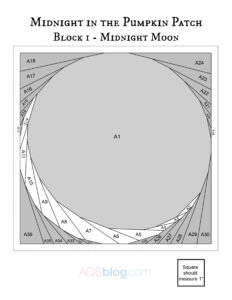
Click Here to download the FPP pattern
To brush up on your FPP skills, click here. Measure the 1″ square to ensure the page printed the correct size.
The Midnight Moon block is made with a single section. Follow the numbers of the FPP templates to complete the block.
Using a water soluble fabric glue pen to hold down the A1 piece is recommended.
Once section A is completed, trim the section to the seam allowance lines marked on the paper.
Adding the Frame
Sew the background 2″ x 8″ strips to the left and right side of the FPP center as shown below. Trim even to the edges of the center.

Repeat with the background 2″ x 10″ strip on the top and bottom.
Use a ruler and a marking tool like a chaco liner to measure the FPP block and from the FPP center through the frame, mark the center as shown below.

Use a ruler and measure 4 3/4″ from the marked center line, and trim with a rotary cutter. Turn the block and measure 9 1/2″ from the trimmed edge, and then trim. Repeat this for the top and bottom of the block to create an evenly trimmed 9 1/2″ square block. Watch the video below to see this method in action.
Next time…
Check back next week when we’ll make the bat block. Until then, join us in the AQS Project Parade Facebook Group, ask questions, share your progress and piece along with us!
0 Comments for “Midnight Moon Block – Midnight in the Pumpkin Patch Quilt Along”