The beginning of the year is filled with a special magic. It’s a time when we empower ourselves to try new things, sort through the past, and set goals that will guide our year. Maybe you’re a new quilter looking to pick up a hobby. (Welcome!) Maybe you’re a seasoned quilter with a stash to sort and UFOs to complete. (We feel you!) No matter where you are in a new year of a quilting adventure, there’s one thing that you need for success: a functional space to work and feed your creativity! We’ve got ideas and recommendations for setting up your quilting space.

Quilters Agree…
We asked readers last year about the spaces where they make quilts. One of the questions we asked was, “Besides your sewing machine, what stations or areas do you use for piecing?” And the answers are the perfect starting point for setting up your own quilting space.
- 9 out of 10 quilters use a designated cutting area
- 8 out of 10 quilters use a designated ironing area
- 5 out of 10 quilters use a designated design area
So, the average quilter’s workspace can be broken up into four areas: sewing machine, cutting area, ironing area, and design area. Let’s take these areas one by one to make each as useful as possible.
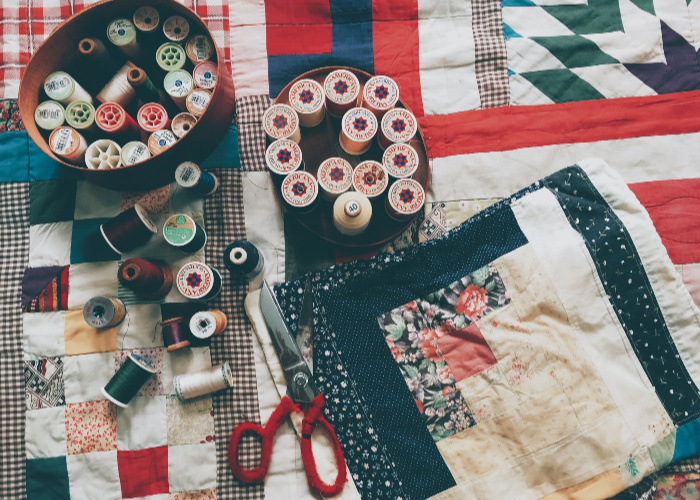
Cutting
Cutting fabric is typically the first step of any quilt project, so we’ll start here. Whether you’re using a rotary cutter, scissors, or a die cutter, cutting can take up the most space. Scout out a clear open area in your home, like a kitchen table.
A 24″ x 36″ cutting mat is a great size for any rotary cutting needs and fits on an average kitchen table. Add in a rotary cutter and a couple rulers and your cutting area is pretty set.
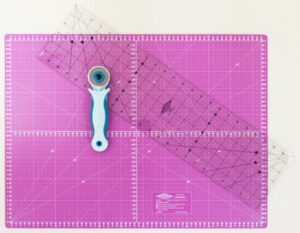
While the cutting area can take up the most room, it can also be the most versatile area in your quilting space. Leave the cutting mat out to provide a great workspace while protecting the table surface. If you are very pressed for space, cut first and then store the cutting station to make room for the other stations.
Sewing Machine
You are the heart of your quilting space. The sewing machine is the second heart. The lungs? Point is, it’s important.
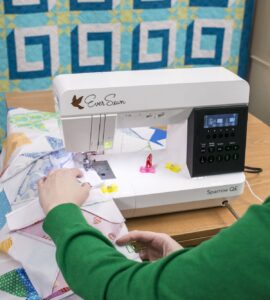
Try placing your machine in a central location in your quilting space. There’s all sorts of wonderful cabinetry and specialized furniture for making your machine as usable and accessible as it can possibly be. But for anyone cramped for space, some room at the kitchen table is a great spot.
If your kitchen table is already hosting the cutting area, try arranging the cutting area so it lives to the left of your machine. This placement lets the cutting area double as a workspace for laying pieces out and any marking or trimming that needs done while not risking running power cords through the area with sharp cutting tools!
Take care of yourself with a nice adjustable chair for your comfort while sewing. And don’t forget to spoil your machine. Click here for a handy guide to keeping your machine happy from project to project.
Ironing
Most of us already have a special piece of furniture in our homes for this step. The ironing board. They come in all shapes and sizes, but the two most common are small tabletop models, and longer freestanding floor models.
The trick to setting up the ironing area is to keep it as close as possible to the sewing machine. If you’re at the kitchen table sewing, with the cutting area to your left, try setting up the ironing board to the right of the table. Adjust the height of the ironing board so you can sit while pressing blocks for even easier use.
If you have a tabletop ironing board and are out of table space, you can place it over the cutting area. The board won’t take up the entire cutting space, and the legs of the board will keep the heat of the iron from warping the cutting mat. (Heat and cutting mats don’t mix.)

Wool pressing mats are all the rage and a real joy to use with quilting. They can be placed over your ironing board if you like to use steam when you iron, or directly on a table if you use a dry iron. They pair perfectly with a small iron for precise pressing.
Design
A design area is a place where fabrics, blocks, sections and rows can be laid out and viewed all at once. As we learned with our survey, quilters are 50/50 on having a design area or not. When laying out quilts, a bed or the floor are the two most common choices for a design surface. Beds and floors are both viable design areas! But if you’d like something that takes up a little less floor space, we have two ideas for you.
The first is a Prop-It Quilt Block Easel. It’s perfect for laying out blocks, and sits easily on the table next to you as you sew.

The second idea is a design wall. There are lots of ways to make a design wall, but one fast, cheap option is to use a flannel backed tablecloth. Hit the dollar store clearance section after the holidays for a deal.

Clamp binder clips along the top edge of the tablecloth, hang the clips on some thumbtacks, and hang your temporary design wall flannel side out. You can audition fabrics, try different block placements, and keep organized while sewing. Place this on the nearest available wall, and when it’s time to clean up, leave the thumbtacks for next time and fold the tablecloth away.
Use Your Quilt Space!

Experiment, adjust, find what layout works best for you. When starting a new project, utilize the design wall while selecting fabrics, cut out your pieces, sew and press with everything at your fingertips. Tackle UFOs (UnFinished Objects, for those who are curious) by unpacking and organizing at the large cutting area, then press any pieces that wrinkled while stored and use the design wall to help you envision the whole project again. You can do most anything with an organized quilting space.
Show off your progress, connect with other quilters, get ideas, motivation and more!
Join us in the AQS Project Parade Facebook Group and piece along with us!
Members get even more…
AQS Members can access hundreds of patterns and digital issues of American Quilter at any time!
Find quilt along series like Forever & A Day, 30 Days of Birds and more.

Not a member? Join today!
I found this article very useful. However, I set up my iron in a different room so that I get up and walk when I’m in a long quilting session. For short sessions, the iron stays in the room where I’m quilting.
Thanks for these wonderful ideas. I actually have 2 rooms dedicated to my quilting and every other type of needle and thread hobbies. I turned my wonderful sunroom into my craft room but have overtaken a guest bedroom to hold all of my stashes of items that don’t fit into my room. I am like Joy Baggett that sometimes I have the iron close but other times at the end of my room to make me get up and move. I can happily stay at the sewing machine for the entire day without eating so moving stuff around helps to stop that from happening.
This article is stated simply and direct enough to follow suggestions. Thank you. It reminds me of an old college joke punch line “Next week we’ll get organized”. Hoping to be organize by then.
Blessings and smiles’
Joyce Shipp