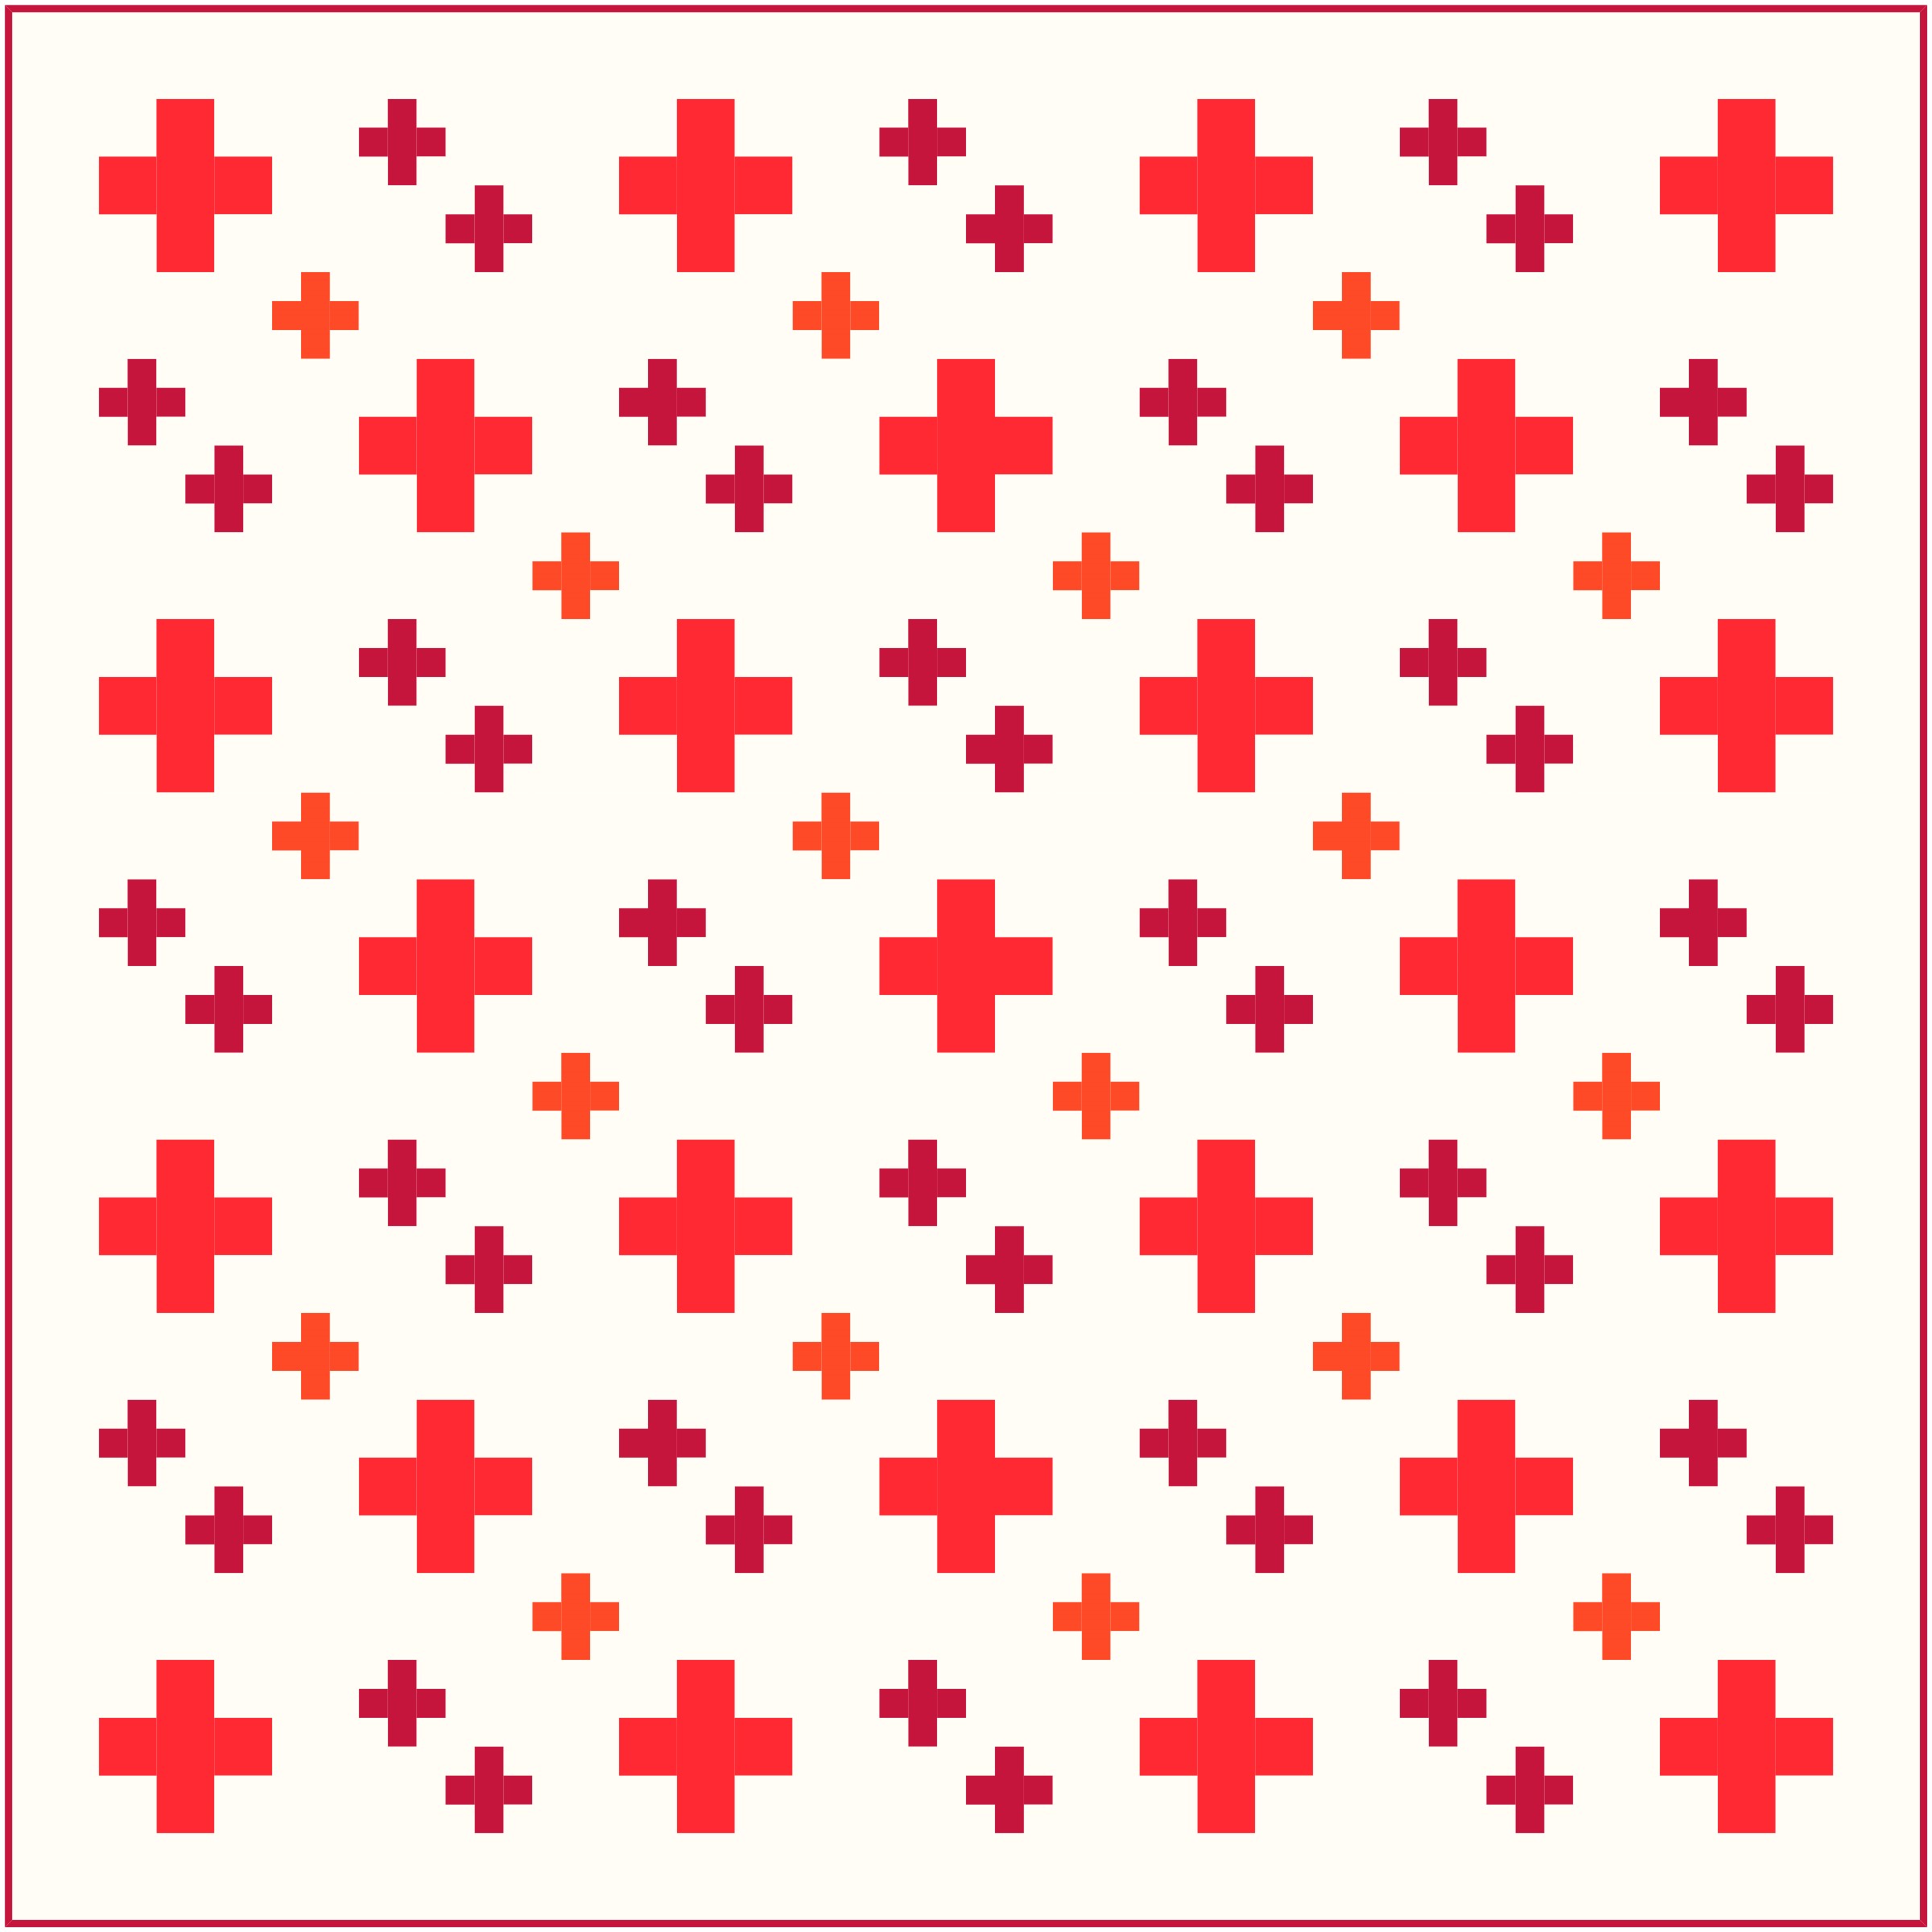
Commemorate and give thanks to heroes and helpers with the Heroes + Helpers Quilt. Check out the signature quilt option at the end of the pattern for ideas on how to say thank you to everyone doing their part to make the world a better place. It’s one more way we’re Quilting on Together!

Heroes + Helpers Quilt
66″ x 66″
by Emily Cross
Fabric Requirements
Background – 3 1/8 yards
Border (pictured same as background fabric) – 7/8 yard
Red – 7/8 yard
Dark Red – 5/8 yard
Binding (pictured same as Dark Red) – 5/8 yard
Backing – 4 1/2 yards or 2 1/4 yards of 108″ wide fabric
Batting – 70″ x 70″
Cutting Instructions
From the background fabric, cut:
(7) 2 1/2″ x Width of Fabric (WOF) strips
(11) 1 1/2″ x WOF strips
(21) 3 1/2″ x WOF strips, subcut into:
(18) 3 1/2″ x 15 1/2″
(48) 3 1/2″ x 6 1/2″
(48)3 1/2″ x 3 1/2″
From the border fabric, cut:
(7) 3 1/2″ x WOF strips
From the red fabric, cut:
(4) 2 1/2″ x WOF strips
(4) 2 1/2″ x WOF strips, subcut into:
(25) 2 1/2″ x 6 1/2″
(3) 1 1/2″ x WOF strips from which cut the following and leave the rest as strips:
(18) 1 1/2″ x 3 1/2″
From the dark red fabric, cut:
(4) 1 1/2″ x WOF strips
(5) 1 1/2″ x WOF strips, subcut into:
(48) 1 1/2″ x 3 1/2″
From the binding fabric, cut:
(7) 2 1/2″ x WOF strips
Block Assembly
Large Plus Block
Sew together a strip set of a white 2 1/2″ strip, a red 2 1/2″ strip, and another white 2 1/2″ strip. Repeat to make 3 sets. Cut a white 2 1/2″ strip in half and use both halves with a red 2 1/2″ strip to sew a half set.
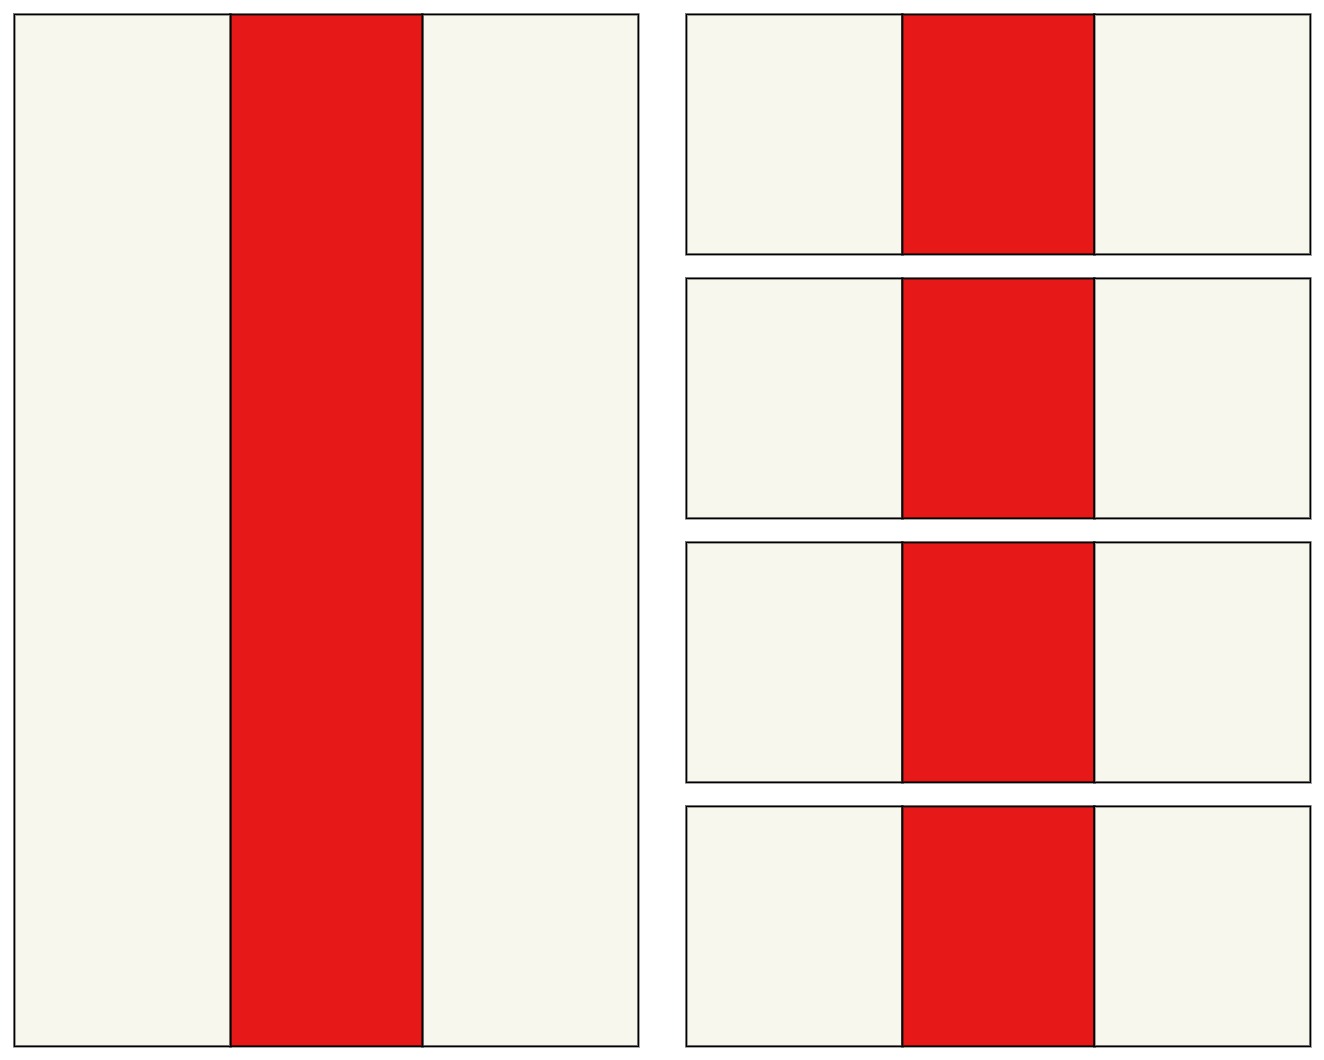
Subcut the sets into 2 1/2″ sections. Cut 50 sections.
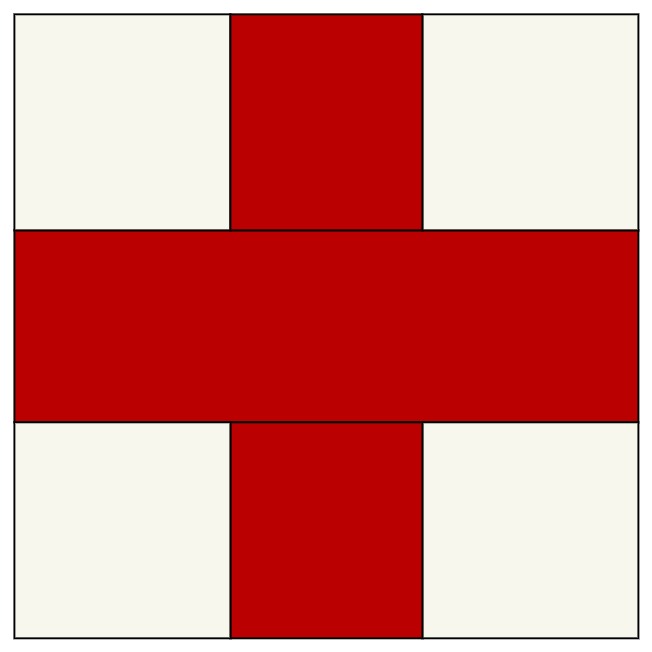
Arrange 2 sections with a red 2 1/2″ x 6 1/2″ rectangle. Sew together as shown below.
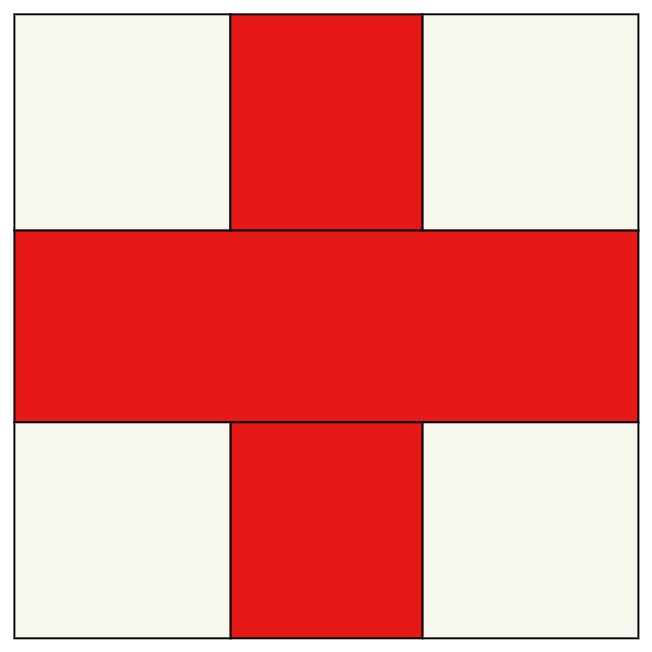
The Large Plus Block measures 6 1/2″ x 6 1/2″ unfinished. Make 25 blocks.
Small Plus Block
Sew together a strip set of a white 1 1/2″ strip, a red 1 1/2″ strip, and another white 1 1/2″ strip. Cut a white 1 1/2″ strip in half and use both halves with a red 1 1/2″ strip to sew a half set.
Subcut the sets into 1 1/2″ sections. Cut 36 sections.
Arrange 2 sections with a red 1 1/2″ x 3 1/2″ rectangle. Sew together as shown below.
The Small Plus Block measures 3 1/2″ x 3 1/2″ unfinished. Make 18 blocks.
Double Plus Block
Sew together a strip set of a white 1 1/2″ strip, a dark red 1 1/2″ strip, and another white 1 1/2″ strip. Repeat to make 4 sets.
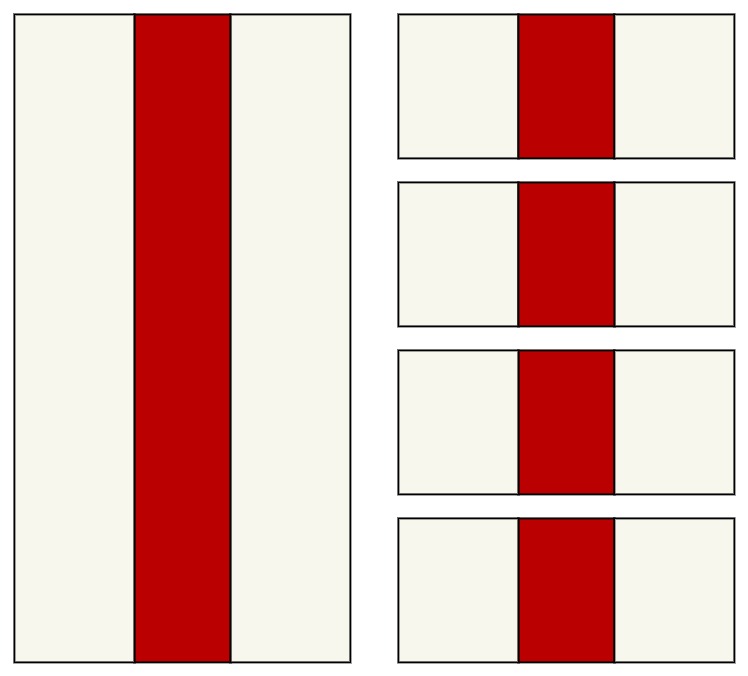
Subcut the sets into 1 1/2″ sections. Cut 96 sections.
Arrange 2 sections with a dark red 1 1/2″ x 3 1/2″ rectangle. Sew together as shown below to make a Small Plus unit.
The Small Plus unit measures 3 1/2″ x 3 1/2″ unfinished. Make 48 units.
Arrange 2 Small Plus units with 2 background 3 1/2″ x 3 1/2″ squares as shown below. Sew together to make a Double Plus Block.
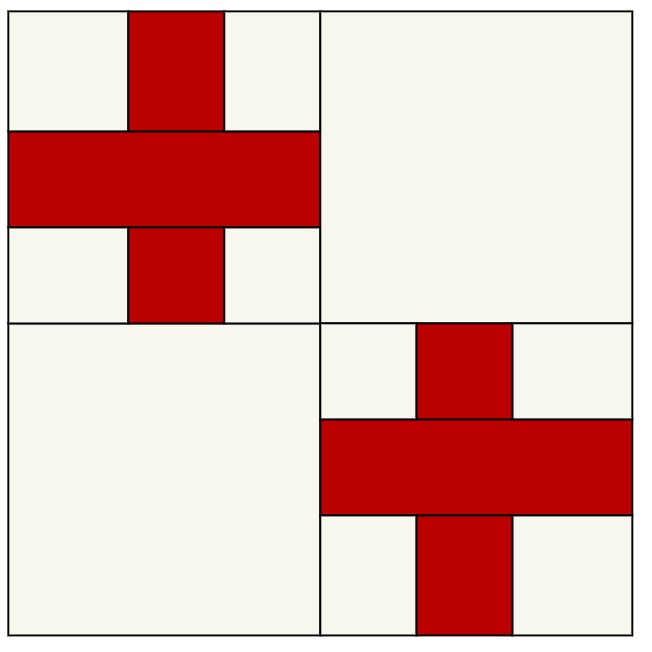
The Double Plus Block measures 6 1/2″ x 6 1/2″ unfinished. Make 24 Blocks.
Row Assembly
Row A
Arrange 4 Large Plus blocks, 3 Double Plus blocks, and 6 background 3 1/2″ x 6 1/2″ rectangles, as shown below.

Sew the pieces together and press. Row A measures 6 1/2″ x 60 1/2″ unfinished. Make 4 of Row A.
Row B
Arrange 1 background 3 1/2″ x 6 1/2″ rectangle, 3 Small Plus blocks, and e background 3 1/2″ x 15 1/2″ rectangles, as shown below.
![]()
Sew the pieces together and press. Row B measures 3 1/2″ x 60 1/2″ unfinished. Make 6 of Row B.
Row A
Arrange 4 Double Plus blocks, 3 Large Plus blocks, and 6 background 3 1/2″ x 6 1/2″ rectangles, as shown below.

Sew the pieces together and press. Row A measures 6 1/2″ x 60 1/2″ unfinished. Make 3 of Row C.
Sewing Diagonal Seams for Border & Binding
Sew the 7 border 3 1/2″ x WOF strips together with diagonal seams to create a continuous strip. To do this, see below.
On a hard workspace, place a strip right side up horizontally with the tail (long ends) pointing towards your non-dominant hand. Lay another strip over the first strip at a 90-degree angle, right sides together, with the tail pointing towards you.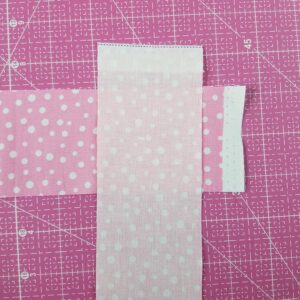
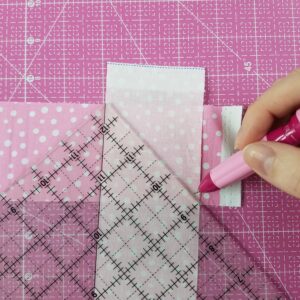
Place a ruler over the strips intersecting at a 45-degree angle as shown below and mark.
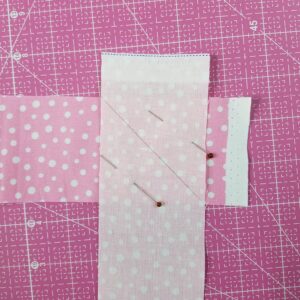
Pin the selvage ends and carefully fold the strip open following the marked line to check that the seam will create a long, continuous strip.
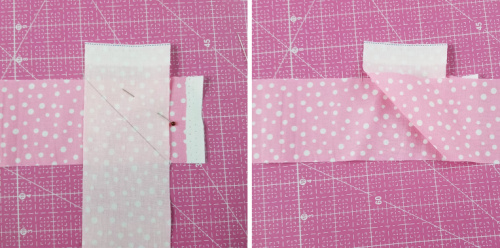
Once you’ve confirmed, replace the top strip over and secure with another pin. Sew on the marked line and trim a 1/4″ seam allowance.
Repeat until all the strips are sewn together.
For the borders, subcut the following from the continuous 3 1/2″ strip:
(2) 3 1/2″ x 60 1/2″
(2) 3 1/2″ x 66 1/2″
Repeat the process for the 7 binding 2 1/2″ strips, but leave them as one continuous strip.
Quilt Assembly
Arrange the rows as shown below. Note that alternating Row B’s are flipped to change if the background 3 1/2″ x 6 1/2″ rectangle is on the left or right end of the row.
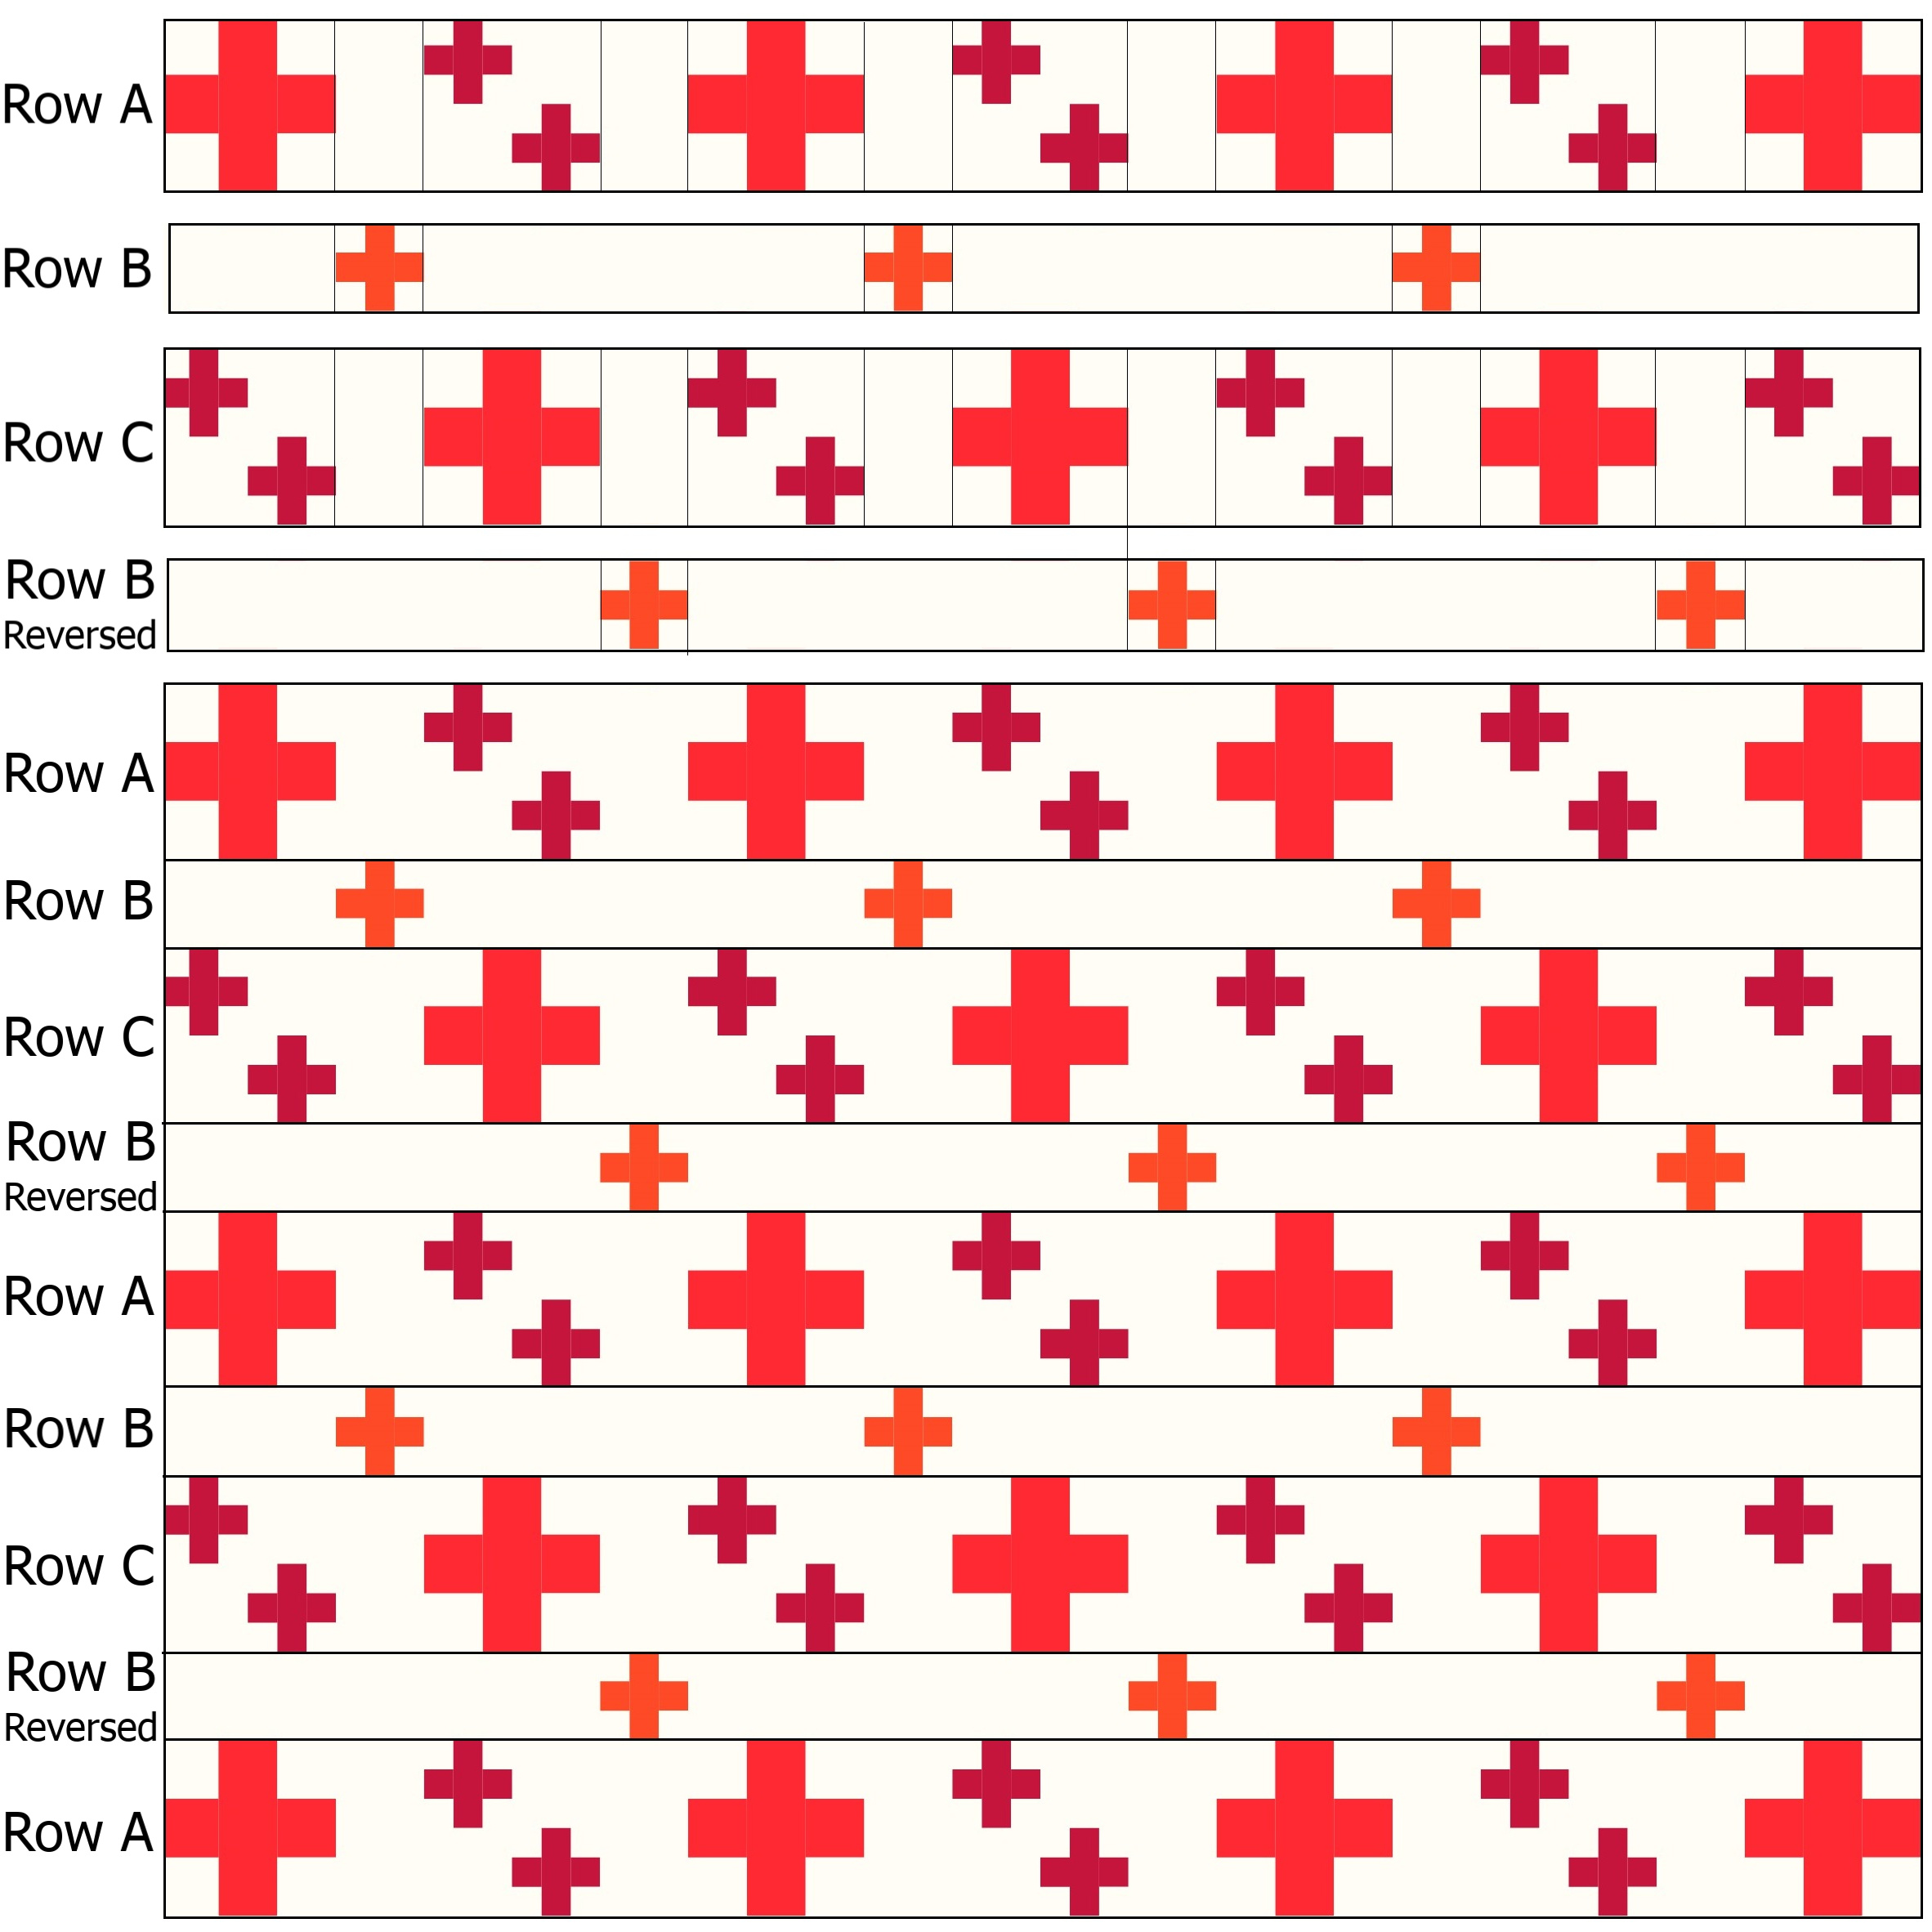
Sew the rows together to complete the Heroes + Helpers quilt center.
Sew the 3 1/2″ x 60 1/2″ border strips to the left and right side of the quilt. Finally, sew the 3 1/2″ x 66 1/2″ border strips to the top and bottom of the quilt center to complete the quilt top.
Layer the quilt top with batting and backing fabric. Quilt as desired and bind using your preferred method.
Saying Thank You

As an alternative, you can use a dark color for the background and a light fabric for the Pluses. In the wide strips, you can write the names of heroes and helpers as a thank you for all they do.
“When I was a boy and I would see scary things in the news, my mother would say to me, “Look for the helpers. You will always find people who are helping.” – Fred Rogers
Show off your creations, connect with other quilters, and get inspired!
Join us in the AQS Project Parade Facebook Group. Share the quilt creations you make!
Members get even more…
AQS Members can access hundreds of patterns and digital issues of American Quilter at any time!
Find quilt along series like Forever & A Day, 30 Days of Birds and more.

Not a member? Join today!
0 Comments for “Heroes + Helpers Quilt – Free Pattern”