
Practice your Flying Geese unit with this easy Flying Geese quilt. Whether you are just learning how to quilt or looking for a quick and easy project, this quilt offers simple construction using half yard cuts. Pick your favorite half yard collection (8 half yards needed) and get sewing right away!
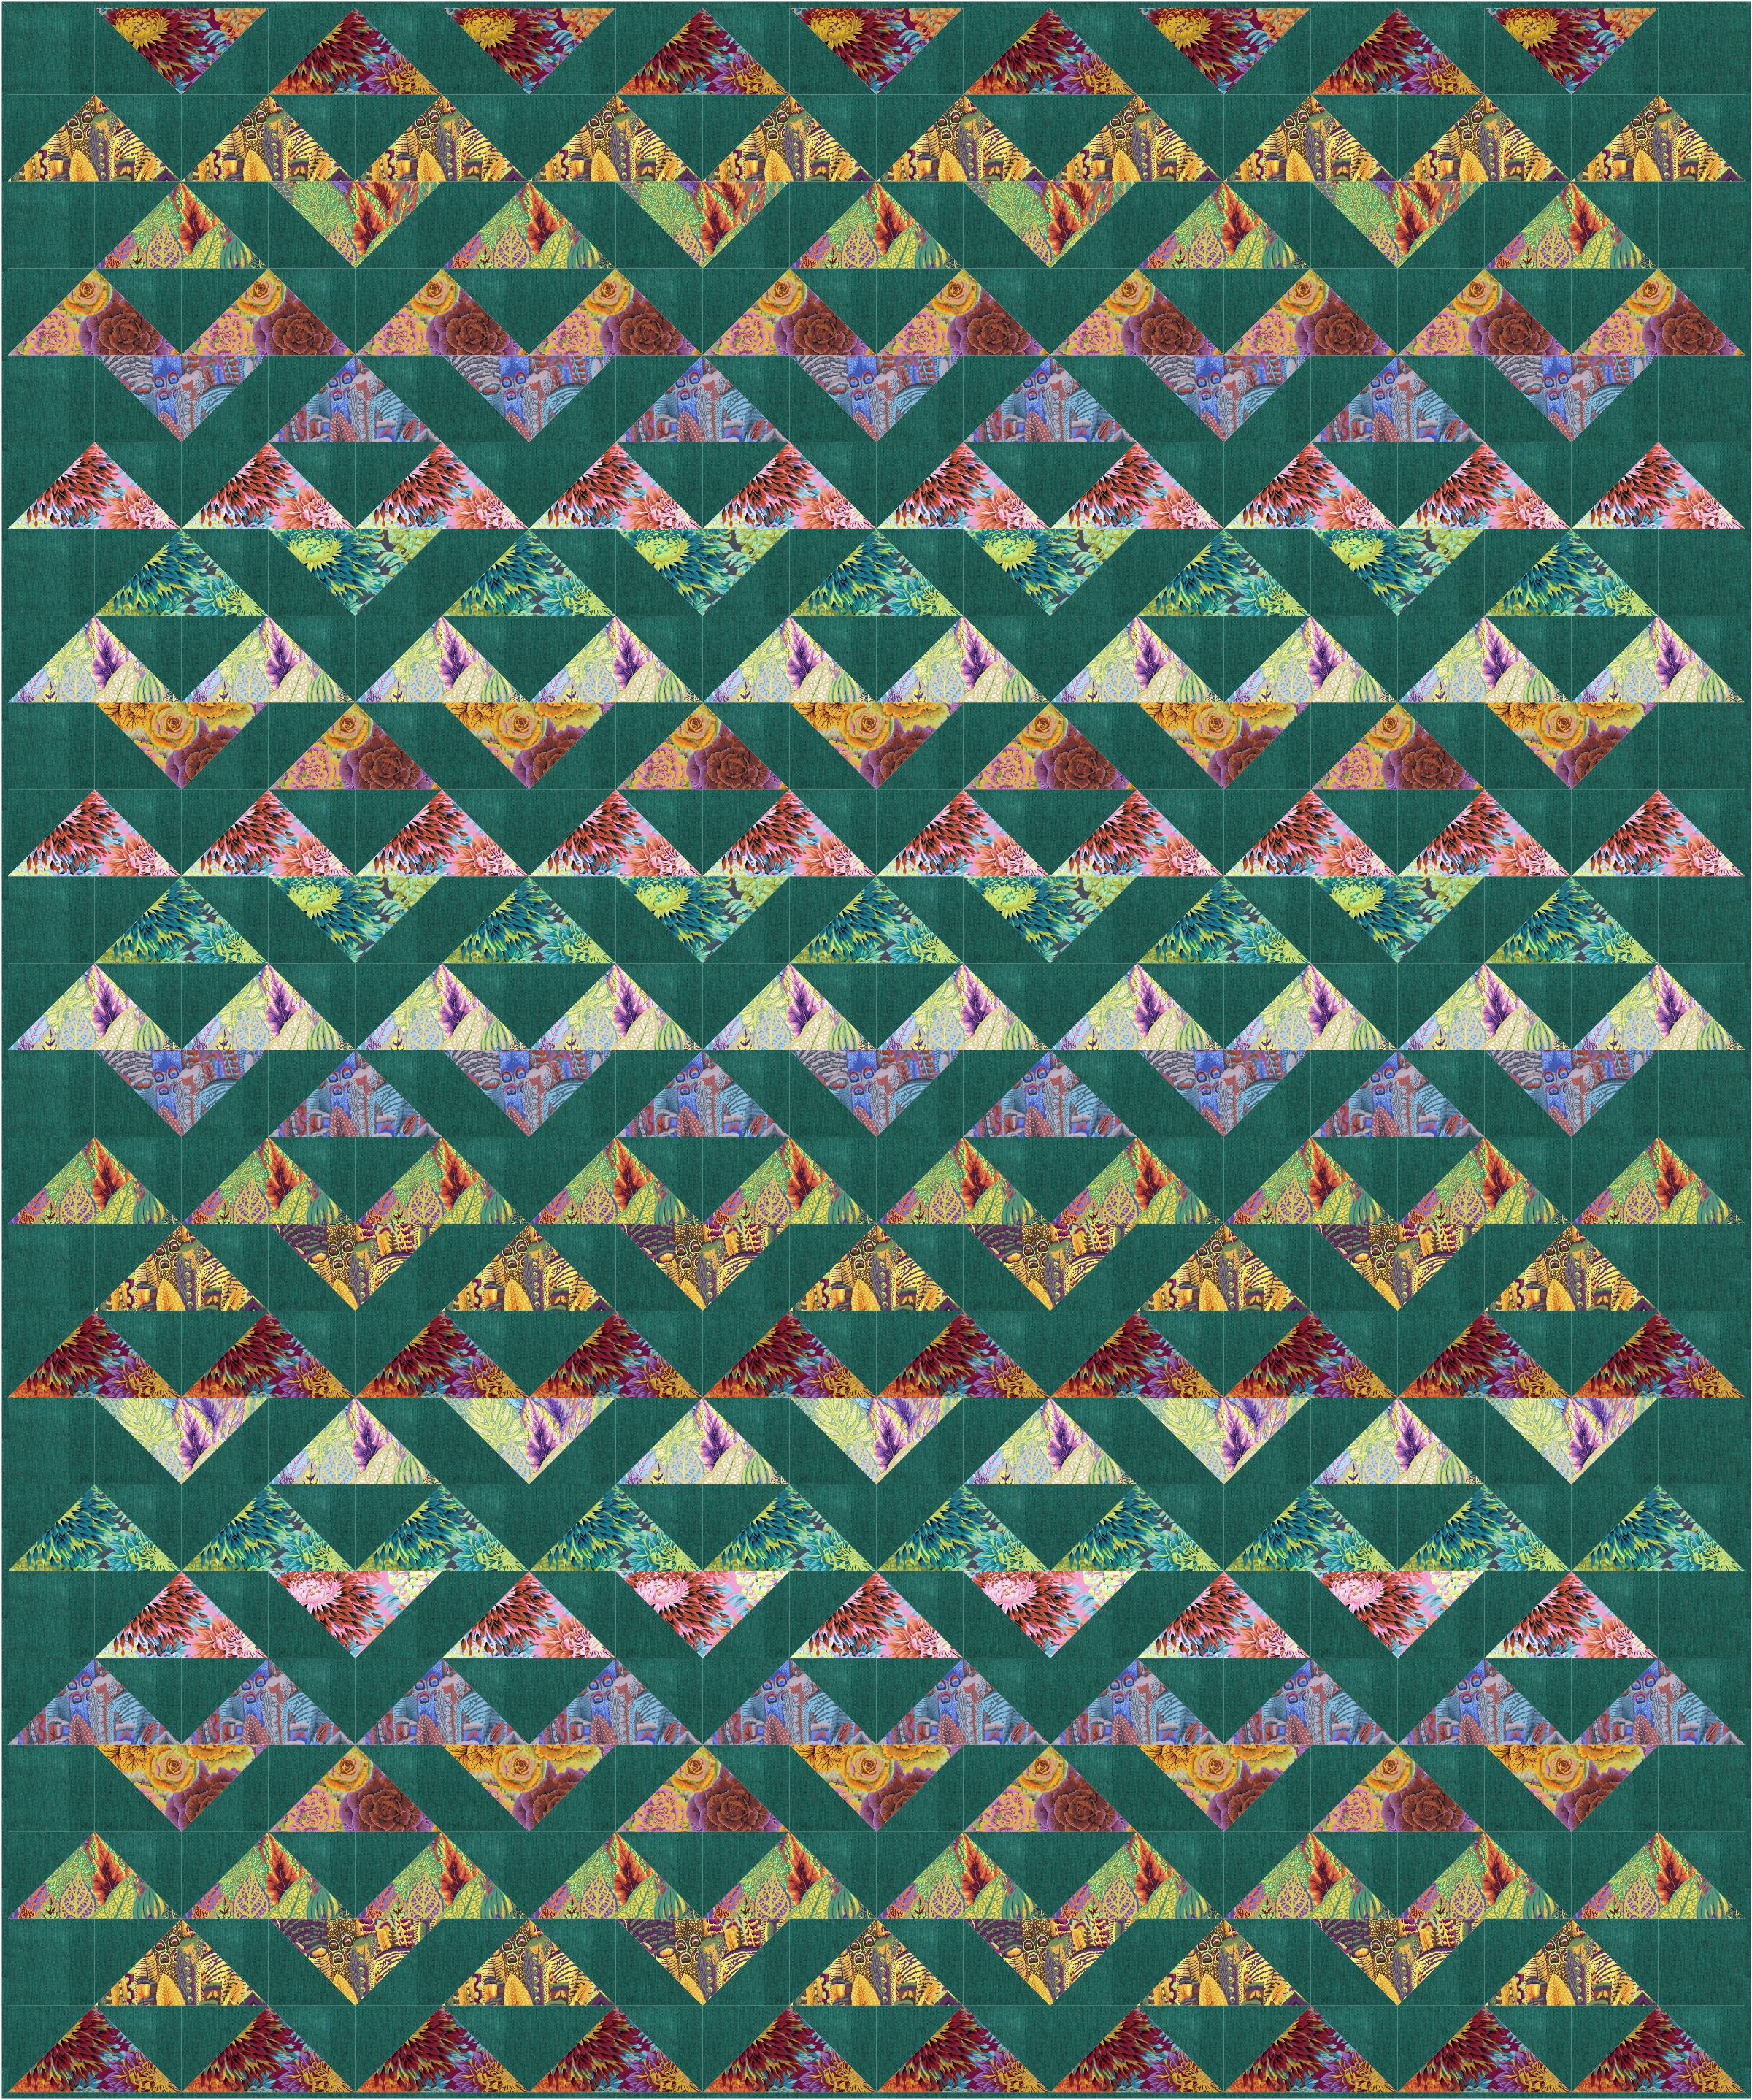
Flying Home Quilt
70″ x 84″
Skill Level: Beginner Friendly
Fabric Requirements
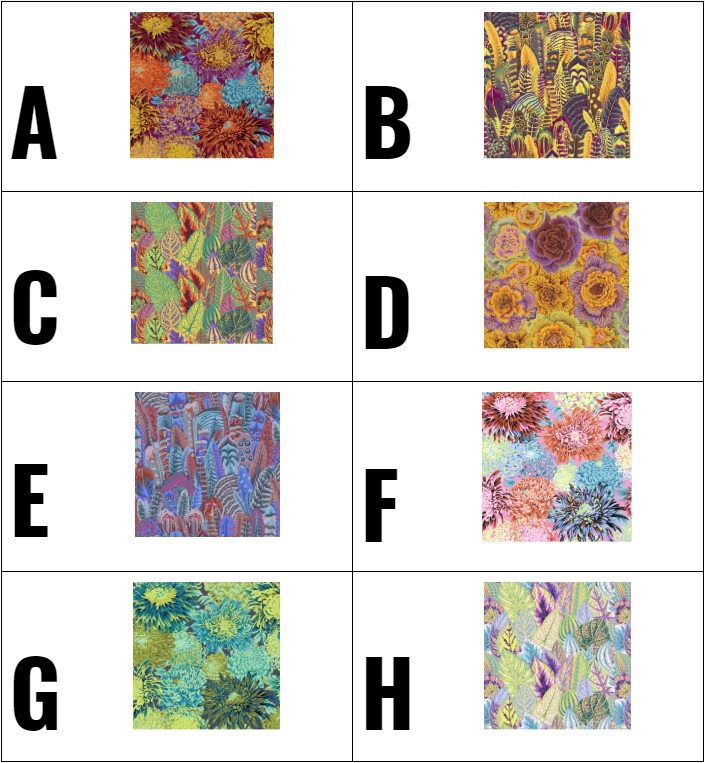
(1) Philip Jacobs Half Yard Collection
or (8) 1/2 yards of various coordinating fabrics
Background – 3 3/4 yards
Backing – 5 3/4 yards cut into (2) 2 7/8 yards sections and sewn together
Binding – 2/3 yard fabric cut into (8) 2 1/2″ x Width of Fabric strips
Fabric Preparation
Label the 8 half yard cuts A-G.
We’ve made a handy fabric labeling reference for you. Staple or glue your fabric swash to its corresponding letter and keep track of your project every step of the way! Get the guide by clicking here.
We used ours to label our Philip Jacobs fabric.
Cutting Instructions
From fabrics A, C, F, and H, cut:
(8) 8 1/4″ x 8 1/4″ squares
From fabrics B, D, E, and G, cut:
(7) 8 1/4″ x 8 1/4″ squares
Total 8 1/4″ x 8 1/4″ squares = 60
From background fabric, cut:
(27) 4 3/8″ x Width of Fabric strips, subcut into:
(240) 4 3/8″ x 4 3/8″ squares
(3) 4″ x Width of Fabric strips, subcut into:
(24) 4″ x 4″ squares
Flying Geese
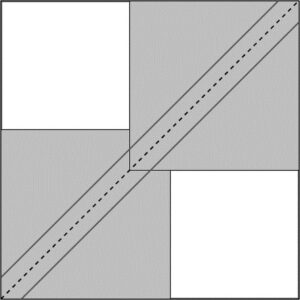
To make the Flying Geese, mark the wrong side of the background 4 3/8″ squares in half diagonally once. The marked squares are the “Sky” fabric.
Lay a marked square over the corner of the labeled 8 1/4″ square right sides together with the marked line pointing towards the center. The 8 1/4″ squares are the “Geese” fabric.
Repeat with another marked square in the diagonally opposite corner. The smaller squares will overlap in the center.
Sew a quarter inch from either side of the marked line as shown below.
Cut apart on the marked center line, as shown above, and press towards the dark triangles. Next, lay a marked square over the corner of the geese fabric triangle, right sides together. Sew a quarter inch from either side of the marked line as shown below. Repeat with the remaining units.
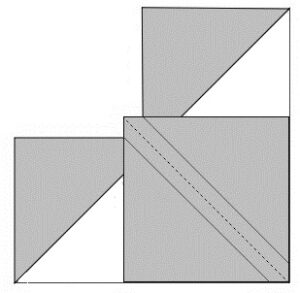
Cut apart on the marked line and press towards the sky triangles to make 4 Flying Geese at once. Flying Geese measure 4″ x 7 1/2″ unfinished. Make the following:
- A – 29 Flying Geese
- B – 28 Flying Geese
- C – 29 Flying Geese
- D – 28 Flying Geese
- E – 28 Flying Geese
- F – 29 Flying Geese
- G – 28 Flying Geese
- H – 29 Flying Geese
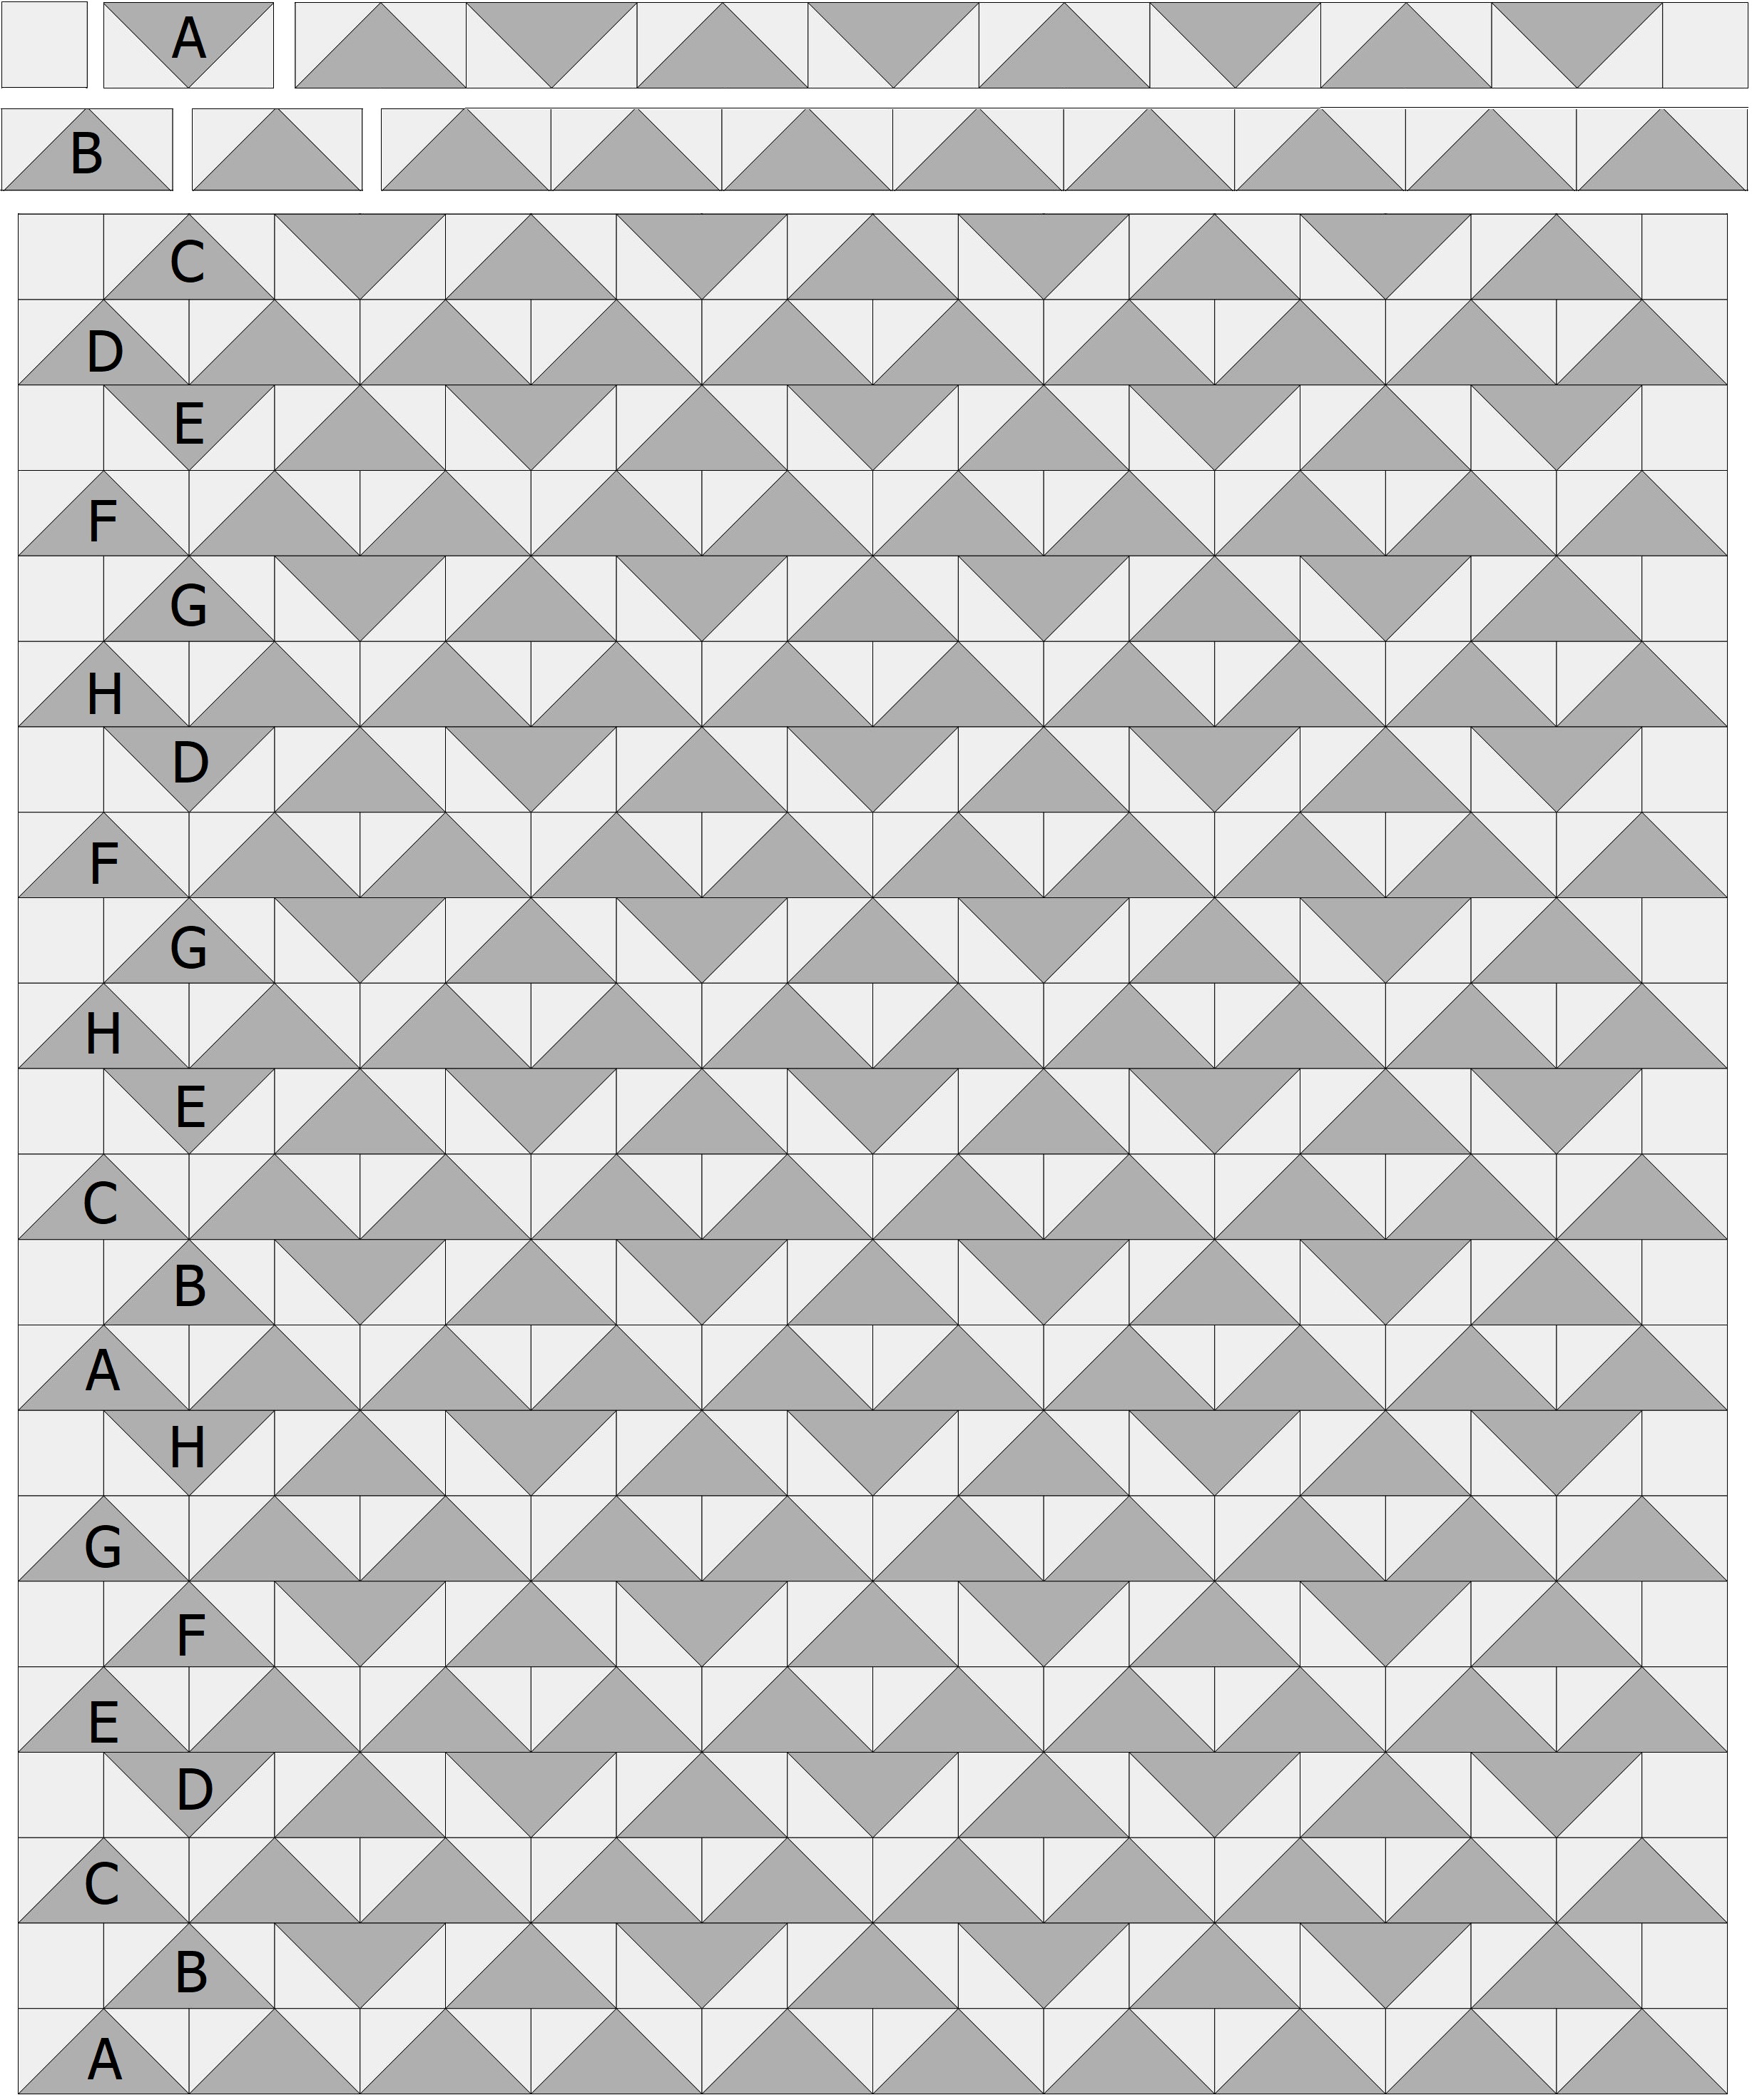
Quilt Assembly
Following your fabric labels and the placement guide below, sew Flying Geese and background 4″ squares together into rows. Sew the rows together to assemble the quilt.
Layer with batting and backing, then baste the layers together. Quilt as desired and bind using the 2 1/2″ strips.
Quilting Ideas: This quilt lends itself to geometric, straight-line quilting. Identify larger shapes to outline and echo inside the shape and fill the other areas with straight lines perpendicular to the shape.
If you want a more rounded look, try a traditional Baptist Fan pattern.
Begin quilting in the center of the quilt and work your way out to the edges. Once complete, sew a basting stitch along the edge of the quilt to secure the layers. Trim the quilt to the edge of the quilt top using a rotary cutter and ruler.
Learning to quilt? Be sure to join our How To Quilt: A Beginner’s Guide Quilt Along.
We love seeing your quilt projects! Share what you’re working on in the AQS Project Parade Facebook Group.
0 Comments for “Flying Home – Free Flying Geese Quilt Pattern”