Let’s Make Patches!
It’s the first week and the first project of Machine Embroider Your Life from American Quilter’s Society and EverSewn! We’re so excited to bring you nine great machine embroidery projects to make in the following weeks. There’s lots of fun in store.
This week we’re making embroidered patches using machine embroidery. It’s a small project with a ton of style and personality. Let’s get started!
Click Here to download the written instructions as a PDF
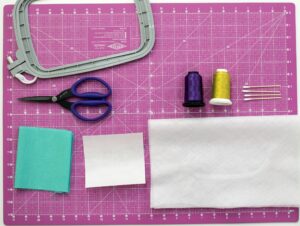
Supplies
- 120 x 180 mm Embroidery Hoop
- 11/75 Machine Embroidery Needle
- Water Soluble Stabilizer (enough for 2 layers)
- 4″ square of Fusible Interfacing
- 5″ square of fabric for background
- Curved Scissors (or other fabric scissors)
- Embroidery Thread(s)
- Cotton Swabs & Water
Fabric Preparation
Fuse the square of fusible interfacing to the back of the square of background fabric following the manufacturer’s instructions. Be sure to choose a weight of interfacing suited to the background fabric in order to create a stiff fabric.
Hooping
Cut two pieces of water soluble stabilizer large enough for the embroidery hoop. Lay both pieces over the outer hoop and then press in the inner hoop over the stabilizer. Close the clamp to secure. Install the hoop in the embroidery machine.
Design
If you’re following along on a machine other than the Sparrow X, arrange the designs following your machine’s editing software.
Open the EverSewn Pro app on your smart device.
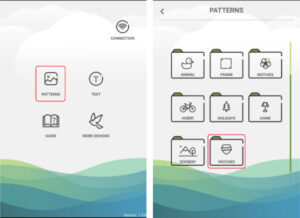
Select the Pattern tab, then the Patches tab.
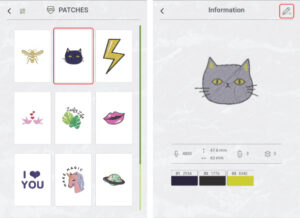
Select the patch you want to make. The app takes you to an information page. Click the pencil button in the upper right corner to send it to the editing screen.
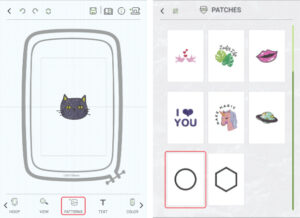
Once in the editing screen, click on the Patterns button in the bottom sliding menu. Click on the Patches tab and select a patch frame. Click the pencil button to send the frame to the editing screen.
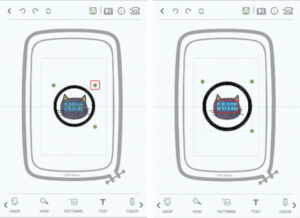
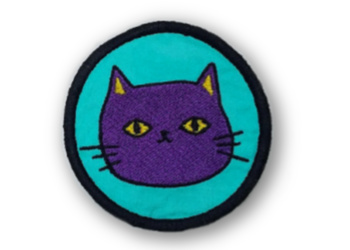
Select the frame, press and drag the arrow button on the right corner of the design to enlarge. Enlarge the frame to fit comfortably around the patch design. For the cat, try about 9o mm.
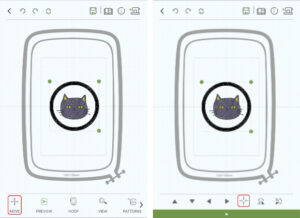
Editing the frame moves it from the center, so to recenter, click the Move button in the bottom sliding menu. Click the centering button, it looks like four arrows pointing towards each other. This centers the selected design.
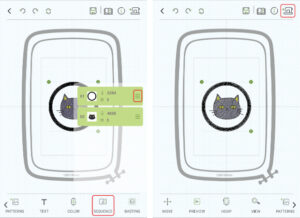
Click the Sequence button in the bottom sliding menu. The frame should be the first part of the design stitched out. Press and drag the three parallel lines to the right side of the green bar to move the item. Once the frame is in the first position, the design is ready to send to the machine. Click the button in the upper right corner that looks like a sewing machine with an arrow pointing at it. This sends the design to the machine for stitching.
Stitchout
Thread the embroidery thread for the frame in the machine. Press the start button on the front of the machine to begin the placement stitch. Once the placement stitch is done, place the already prepared background fabric square over the placement stitch area. Press the start button to begin the tacking stitch part of the frame design.
Once the tacking stitch is done, remove the hoop from the machine. Cut out the background fabric around the outside of the tacking stitch. Curved scissors can really help trim close to the tacking stitch without cutting the stabilizer. It’s okay if a few of the tacking stitches are cut because they’ll be sewn over again.
After trimming the background fabric, reinstall the embroidery hoop and continue the stitchout. Follow the prompts on the app for thread color changes until the patch is finished stitching.
Final Touches
After stitching out the patch, remove the hoop from the machine and the patch/stabilizer from the hoop. Lay the patch flat on an area to work, and note that it’s helpful to put down some scrap paper or cloth to catch the mess.
Dip the cotton swabs in water and wet around the edge of the patch to dissolve the water soluble stabilizer. Once the stabilizer is dissolved, lift the patch away from the remaining stabilizer and smooth any rough edges with a fingertip.
Click Here to download the written instructions as a PDF
Keep the fun going!
Join us in the AQS Project Parade Facebook Group to show off your creations!
Members get even more…
AQS Members can access hundreds of patterns and digital issues of American Quilter at any time!
Find quilt along series like Forever & A Day, 30 Days of Birds and more.

Not a member? Join today!
I don’t have the Sparrow X, so I don’t have the ability to embroider through the app. How can I get the designs if I don’t have the app? Is there a design in .ART? How do I make the patch without the design in the app? You said, “f you’re following along on a machine other than the Sparrow X, arrange the designs following your machine’s editing software. “
The cat and frame used in our example comes with the Sparrow X and isn’t available for individual purchase, but the process works for any kind of patch design. You’ll need to use a design for patches that either comes with your machine or that you can purchase in a file type your machine supports. Thanks for the question, Daniela! -Emily
I don’t have a Sparrow machine. Do the embroidery designs come with this class or do I use something on my machine? Just checking.
Most of the designs we’re using come with the Sparrow X and you’ll want to swap it out for something on your machine. We’ll be sure to note when we use a purchasable pattern and share where to find it. Thanks for your question! -Emily
Sweet Patch with great instructions. Thank You!
Easy to follow tutorial. Thank you. Is there a reason why you remove the fabric and trim before finishing the design? I am new to embroidery and have trimmed after the design is completed.
Trimming the fabric between the basting stitch and the satin stitch to finish the outline of the patch allows for a clean, finished edge that doesn’t need to be cut out later because it can be dissolved away from the water soluble stabilizer. Trimming the fabric after the satin stitch would risk cutting the stitching and a little fabric would always show for this project. Always follow any sewing instructions that come with the design you’re working and make any choice that suits your project.
There are applique techniques for machine embroidery that involve cutting the shape out ahead of time (We do this in the Applique Wallhaning later in the series) but that doesn’t work with this project because using spray baste to adhere the patch to the stabilizer would dissolve the stabilizer.
Thanks for the question, Claudia!