

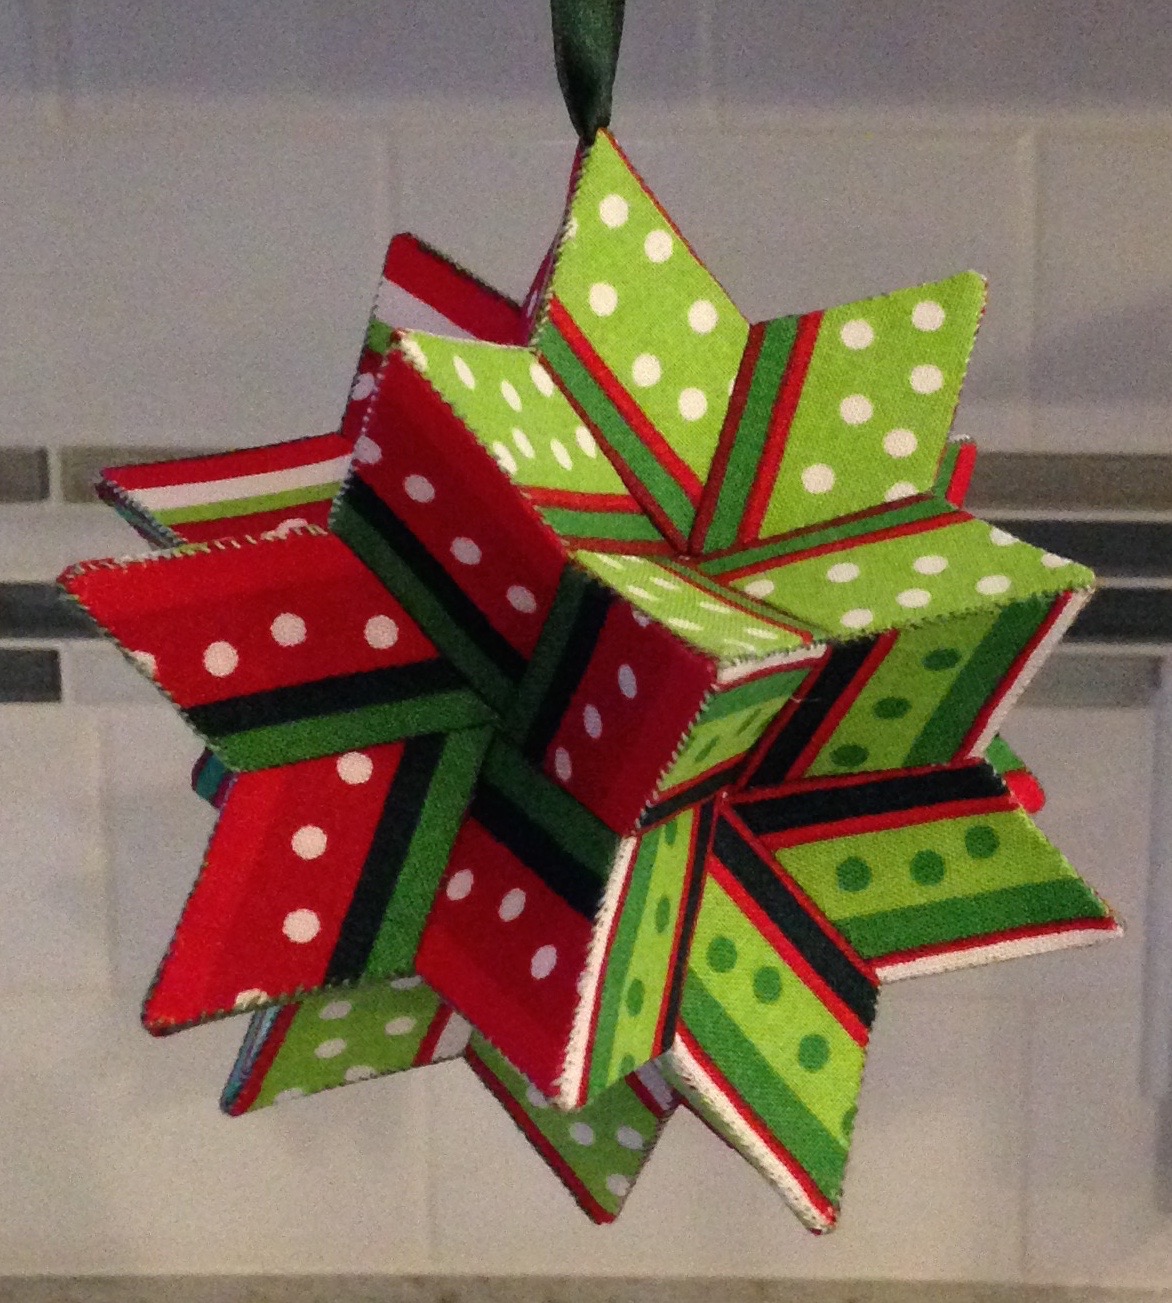
Join us and make Jennifer Strauser’s Moravian Star Ornament.
Here’s our schedule:
Week One: Fabric Selection, Cutting & Basting – See Below
Week Two: Ornament Assembly – See Below!
Week Three: Show & Tell – See Below!
Fabric Requirements & Supplies
Fabric: 1 Fat Quarter
Paper Pattern Pieces: (60) 1″ 60° diamond paper pieces – Click here to download printable diamonds.
Note: If you are printing your own diamonds from the provided templates, print them on card stock weight paper.
Strong Thread to coordinate with your fabric
Glue – Sewline Fabric Glue Pen or Roxanne’s Glue Baste-It, or Elmers Glue Stick
Hand Sewing Needle
Scissors
Want to see the full pattern now? Click here for the Moravian Star Ornament Free Pattern.
Week One
Cutting the Diamonds
Choose your fabric. It takes about 1/4 of a fat quarter. Strips all for the creation of a kaleidoscope effect, and the fussy cutting isn’t as labor intensive.

Lay out 5 diamonds along a stripe, making sure the edges lined up a the same line on each diamond. It takes 5 identical diamonds for each face of a star to create the kaleidoscope effect. Be sure to leave at least 1/2 inch between each diamond, and 1/4 inch on the sides. Using a 1/4 inch seam allowance creates more durability. Glue each paper down thoroughly. The papers are going to stay in the star for stability.
Prepare 60 diamonds.

Cut out each set of diamonds before laying out the next one.
Basting the Diamonds
To glue the seam allowances, start with the same side on each diamond. Do a little tuck, tuck, fold on each tip, to prevent flying tails. Flying tails are ok for regular patchwork, but they get in the way with the sharp star points on this project. If the glue isn’t sticky enough to hold while drying, use wonder clips to secure the fabric until the diamonds are dry.


Prepare 60 diamonds.
Week Two
Making Little Stars
Now, for the fun part. Lay out 5 stars to make sure they are going in the direction you want. It is going to look like a mistake, as you will have a gap. I then sew the first pair together, and just add one diamond at a time until I have five. The last space gets pulled together, so that you have a little basket with five star points. It feels weird, but stay with me. Do this 12 times. I take a few extra stitches across the various points to get them pulled snugly together.


I hold the pieces flat next to each other, and whip along the back. That keeps my stitches less visible on the front.

Assembling the Star
Now it is time to join the baskets together. The stitching on this part is on the outside. Yes, the stitches will be visible. Make the stitches a little bigger than usual, and try to keep them fairly even. I just do a whip stitch. The directions I read said to make two groups of six, then sew them together. I can’t control myself like that, so I start with a pair, then just keep adding one at a time.


Right from the start, it feels like it is not going to come together, but as you stitch along each side, the corners match up like magic. The star does get a little ungainly, but when adding just one piece at a time it isn’t too bad. Just be sure that each tip of the 3-D star has three diamonds coming together to form the point.

Quilting inspectors are crucial.

For this star I added a hanging ribbon. It is just a length of satin ribbon (it came tied around the FQ bundle!) that I folded in half and knotted. Once I was mostly done, I sewed up to a point, laid the ribbon on, knot inside the star, and stitched around it.
I find the trickiest part to be hiding the last knot. I just do my little knot where I make a loop and pull the needle through a couple of times, then I run the needle into the star and come out across the way. I pull it snug so the knot pops in, then clip the thread. All done!
Don’t Miss Out!
Join the conversation and share your progress on our AQS Christmas Countdown Facebook Group.
Take a look at our progress!


A special thank you to Jennifer Strauser for sharing her this fabulous ornament with us and helping out with our Moravian Star Make Along.
Be sure to visit Jennifer’s blog: Dizzy Quilter
![]()
How many total diamonds are needed? It doesn’t say.
Hi Karen, It’s in the supply list: Paper Pattern Pieces: (60) 1″ 60° diamond paper pieces. It’s easy to miss with all those numbers together. Take care, Betsey
Do we need to sign up to do this Star sew along?
Hi Janice, No sign up needed. Check back next week and we’ll update this post with part 2. Feel free to join the Facebook group: https://www.facebook.com/groups/1309565379147836 to show off your progress and see what others are up to. If you don’t wish to participate in the Facebook Group, you can send pictures of your project to socialmedia@americanquilter.com so it can be included in our Show & Tell at the end.
Would 1 charm pack work for this project?
Hi Susie, A charm pack would work well for this project. Enjoy! Betsey
Thanks for this pattern. I have been wanting a copy of it for quite some time. I’m hoping to use it as a consumer economics lesson to teach a group of students how sewing and DIY can be a healthy way to use what we have available instead of just spend more money as they prepare for holiday shopping. Not to mention I can now make a bunch of these for friends.