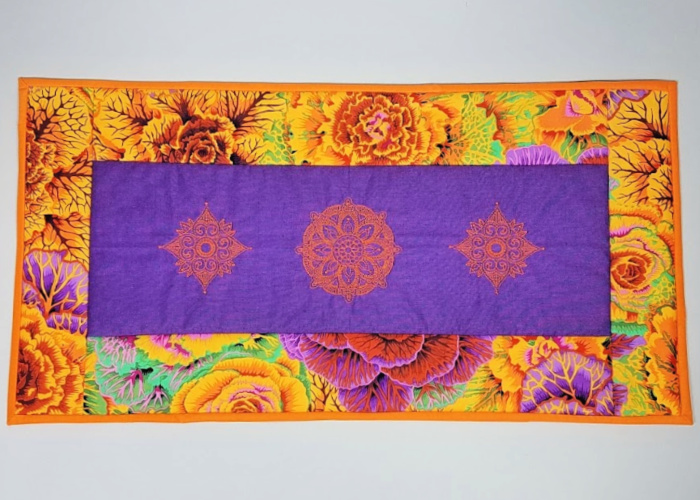
Let’s make an Embroidered Tablerunner!
It’s the ninth week and the eighth project of Machine Embroider Your Life from American Quilter’s Society and EverSewn! We’re so excited to bring you nine great machine embroidery projects to make in the following weeks. There’s lots of fun in store. This week we’re finishing our embroidered tablerunner. Let’s get started!
Click Here if you missed part 1 of the tablerunner!
Click Here to download the written instructions as a PDF
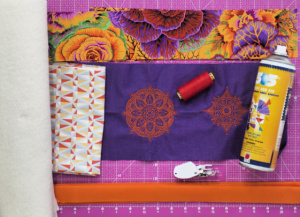
Supplies
- Backing fabric
- Batting
- Binding fabric
- Sewing thread
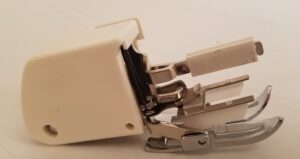
- Walking Foot
- Craft Adhesive Spray Baste
- Ruler
- Scissors
- Seam Ripper
- Wonder Clips
- Center panel and borders from part 1
Machine Preparation
Remove the embroidery module from your EverSewn Sparrow X or other combination embroidery and sewing machine.
Uninstall the hopping/embroidery foot following the manual instructions for your machine. Install a walking foot also following the manual instructions for your machine.
Optional: Install cotton sewing thread. You can absolutely use the embroidery thread already installed in your machine if you’d prefer, but cotton thread will hold up to any wear and tear the seams could experience throughout their life.
Quilt-As-You-Go Sandwich
Lay out the backing fabric wrong side up in a well-ventilated work area away from your sewing machine. Prepare a piece of batting to fit over the backing and place it on top of the backing. Fold back half of the batting and spray it with the basting spray. Fold the batting back over the backing to adhere. Repeat on the other half and smooth out any wrinkles.
On the top of the batting, center the embroidered center panel from part 1. Repeat the basting process to place the center panel.
Borders
Place a long border over the long side of the center panel, right sides together with the edges matching. You can cut the borders the exact size as the center panel, or you can leave them a little longer.
Sew a 1/4″ seam allowance, starting and stopping where the center panel begins and ends.
Press the border away from the center. Repeat on the other long side, and then on the short sides. If you leave the ends long, line up the short borders to the center panel, not the borders.
Basting & Trimming
Set your stitch length as long as possible and sew a 1/8″ to 1/4″ basting stitch around the outer edge of the tablerunner to hold the borders in place while trimming.
Use a ruler to measure from the border seam to the edge of the border. Measuring from the seam ensures a straighter cut. Trim the excess material and trim the opposite side. Then trim the other two ends, making sure to line up to the previously cut sides for square corners.
Binding Preparation
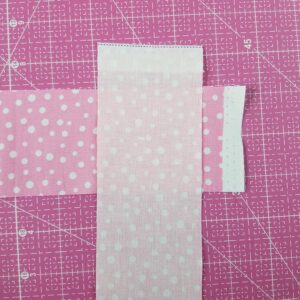
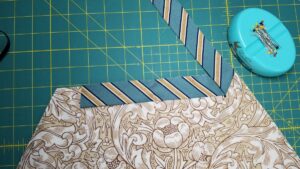
Sew the binding 2 1/2″ x WOF strips together into one long strip with diagonal seams as follows.
On a hard workspace, place a strip right side up horizontally with the tail (long ends) pointing towards your non-dominant hand. Lay another strip over the first strip at a 90-degree angle, right sides together, with the tail pointing towards you.
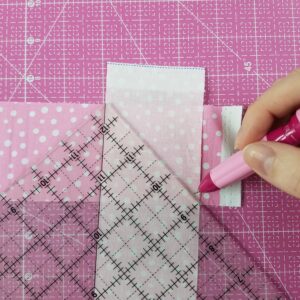
Place a ruler over the strips intersecting at a 45-degree angle as shown below and mark.
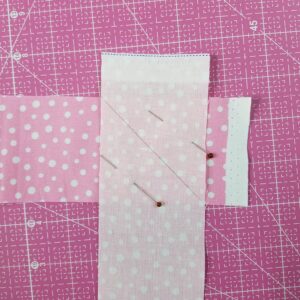
Pin the selvage ends and carefully fold the strip open following the marked line to check that the seam will create a long, continuous strip.
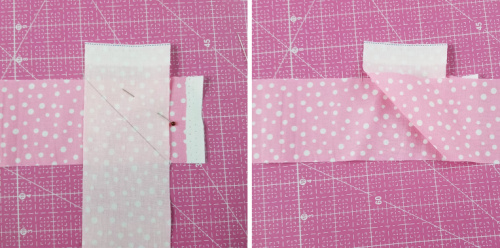
Once you’ve confirmed, replace the top strip over and secure with another pin. Sew on the marked line and trim a 1/4″ seam allowance.
Repeat until all the strips are sewn together. Press the seam allowances open.
After sewing all the strips together, fold the binding strip in half, wrong sides together and press a crease. Repeat this down the entire length of the strip.
Sewing on Binding
Leave yourself about an 8″ tail of binding. Place the binding over the tablerunner top so the raw edges of the folded binding and the raw edge of the tablerunner line up. Sew the binding on 1/4″ from the edge. It can be helpful to sew binding on using a walking foot to help with moving all the layers.
Start near a corner. As you sew towards the corner, look to stop on the 1/4″ mark from the edge you made earlier. Bring your needle down in the 1/4″ mark and take a few backstitches to secure the binding. Lift the foot and cut the thread.
Fold the binding back on itself so the raw edges of the binding and the tablerunner are even to one another. This fold creates the miter.
Hold the fold with a finger or pin, and then fold the binding back over the fold to line up over the tablerunner once more. Start sewing the binding on again as before.
Watch this method in action as Bonnie Browning demonstrates how to start a double-fold binding and how to sew a mitered corner.
Joining the Binding Ends
Sew on the binding until you’re about 12″ from where you began sewing the binding on, and take a couple back stitches to secure.
Use a pair of scissors to trim one of the ends about 6″ from the seam. Replace this end over the tablerunner with a little sticking out from the edge so we can see the end of it easily. Now lay the other binding end on top of the trimmed binding end. Measure 2 1/2″ from the trimmed binding end to create a 2 1/2″ overlap. (That’s the width of the binding.) Mark that measurement and trim on the marked line using a pair of scissors.
Move the top binding end aside for a moment. Open the fold on the bottom binding end to see the wrong side. Fold over the corner of the end at a 45-degree angle away from you. A triangle of fabric will be right side facing up. Finger press a crease into this diagonal fold.
Lay the top binding over the diagonal fold. Now match the ends of the binding together so the right side of the top binding end and the right side of the diagonal fold are facing. Pin the ends together to hold the matching edges.
Place pins across the diagonal of the binding to simulate the seam line. Refold the binding in half like the seam is already sewn. Lay the binding over the tablerunner to ensure the binding fits and that it isn’t twisted. Once satisfied, unfold the binding again and sew the diagonal line marked by the pins (remove the pins as you sew). Trim the seam allowance to 1/4″ and press open. Refold the binding in half and finish sewing the binding to the tablerunner.
Watch this technique in motion as Bonnie demonstrates how she joins binding ends and shares how she remembers the process from project.
Finishing the Binding
Roll the edge of the binding over the raw tablerunner edge and around to the back. Use wonder clips, secure the binding in place. Working from the front stitch in the ditch along the folded binding edge. Take your time stitching in the ditch, and feel the binding on the back of the tablerunner as you feed it through to make sure the stitches will catch it. Then you sew around the whole tablerunner, check the back for any places the stitches missed the binding on the back and take that section again until all the binding is secure.
Click Here to download the written instructions as a PDF
Keep the fun going!
Join us in the AQS Project Parade Facebook Group to show off your creations!
Members get even more…
AQS Members can access hundreds of patterns and digital issues of American Quilter at any time!
Find quilt along series like Forever & A Day, 30 Days of Birds and more.

Not a member? Join today!
0 Comments for “Machine Embroider Your Life: Embroidered Tablerunner – Part 2”