An Applique Pressing Sheet provides a non-stick surface for pressing. The amazing part of a pressing sheet is that it will release a fusible adhesive once the applique is ironed to the sheet. This makes pressing sheets indispensable in the fusible applique process!
Here are the steps to building an applique on a pressing sheet:
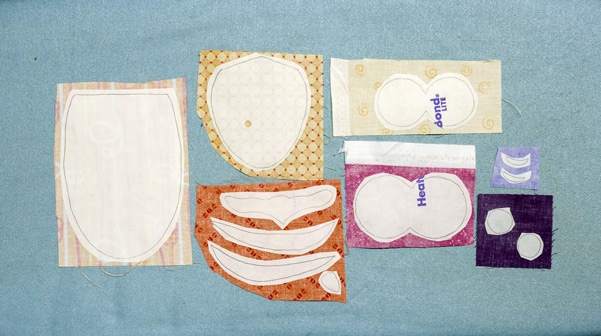
Step One: Prepare the pattern pieces and fuse them on the wrong side of selected fabrics.
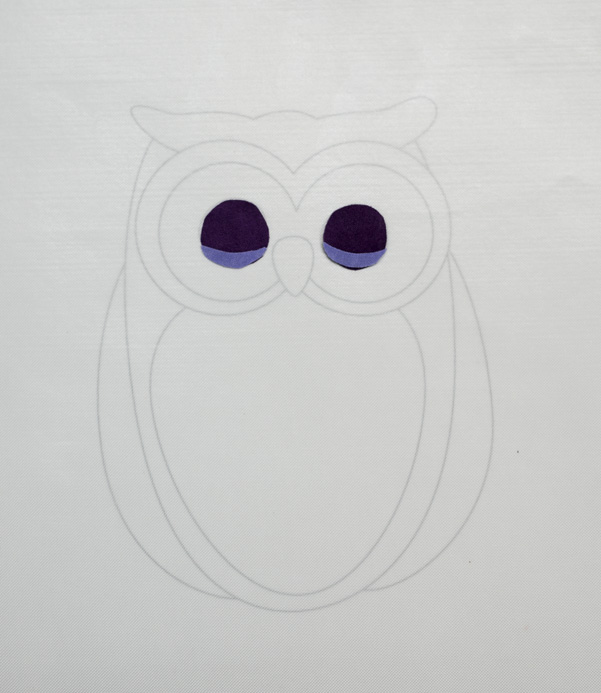
Step Two: Starting with units that can be layered together, build the units on the pressing sheet, fusing each layer in place. Notice that the placement pattern is visible beneath the pressing sheet. First, press the dark purple eyelids in place. This makes it easier to position the light purple eyelids, and then press in place. The pressing sheet acts like an extra hand holding everything in place for you!
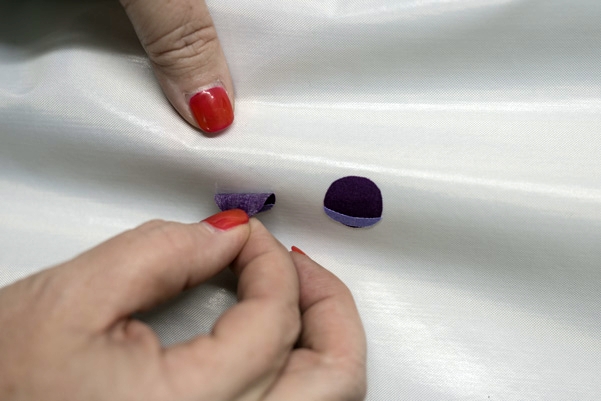
Step Three: Once the units are cool, peel them from the pressing sheet.
Step Four: Continue building the units of the applique, adding them together to create sections. Here, the wings were pressed in place, using the placement diagram as a guide, then the body was added, and finally the tummy.
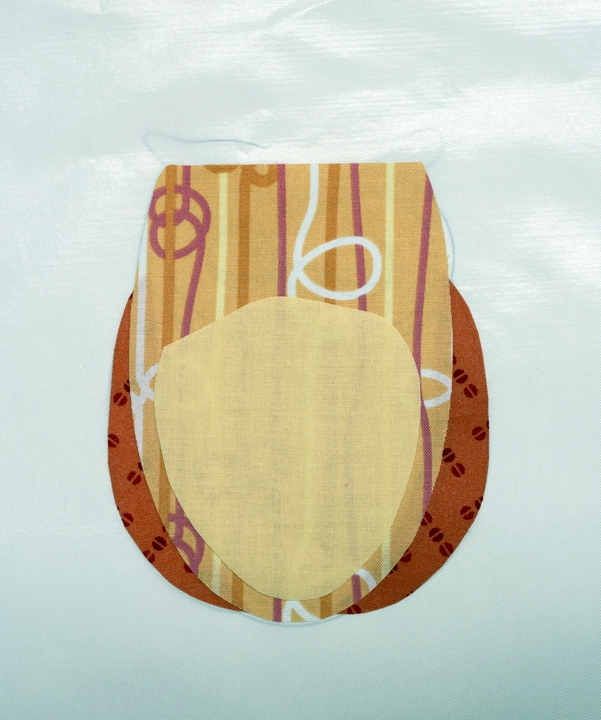
Below, we used the eyes that were pressed earlier and have added them to top section.

Step Five: Fuse the sections together on the pressing sheet completing the applique.
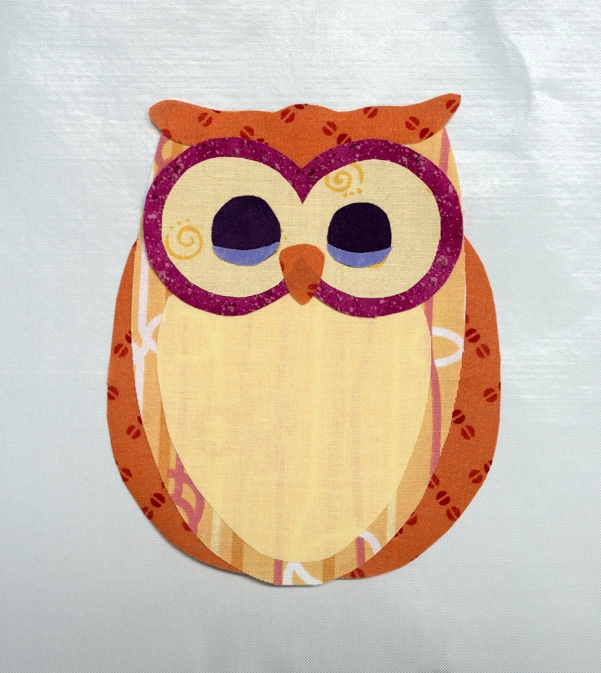
Peel the applique off the pressing sheet, now you are ready to applique this adorable owl quilt label to the back of your quilt. Position the applique in place on the background fabric, and press. It’s that simple!
Enjoy this charming Owl Quilt Label. Download the pattern here.
After using the pressing sheet, eventually does it become useless once all the fusable is used for the applique pieces? Thank you.
Hi Barbara, Since the fusible stays on the applique pieces, not the pressing sheet, the pressing sheet can be used again and again. If you get a little extra fusible residue on it, it wipes right off. I’ve had my pressing sheet for years and years! Thanks, Betsey
Betsey, thanks so much for the tutorial. I, too, have had my pressing sheets for years and, because they do wipe clean with a wet cloth, I use them for many, many things and would not be without them. My husband also uses one in his model building crafts. I was having a problem using them to build applique units but I realized, after reading through your tutorial, that I was skipping one very important step: I was not letting them cool completely and was leaving adhesive on the mat rather than the applique. Now, I know better.
I also use a pressing sheet but in addition I use a T-fal Iron. If any goo gets on the iron I unplug it, let it cool and wipe off any glue that was on it just like the pressing sheet.
Thank you so much for this tutorial. I have have been using my pressing sheet wrong all these years. Never too old to learn something new.
As someone who struggles with applique, I don’t understand the purpose of step two? Why place it on the pressing mat and peel off? The pattern for the eyes was adhered to the fabric in step one; isn’t the next step to cut them out and adhere to the owl face which appears in step five.
Hi Jeanne, Working on the smaller stackable units first lets you take advantage of the placement diagram under the pressing mat. Trying to build the smaller units on top of other units can make it harder to see the placement diagram underneath. You are correct, it’s not necessary with this pattern since the little lids have an obvious placement, but is shown as an example of the recommended practice when building a multi-layer design. For other pattern it can be essential to build out the little layered parts first. When building your appliques, please use the order of assembly that best works for you. Thanks, Betsey
Thank you, but still not making sense for me. I guess applique is still down the road for me.
Jeanne, you said “The pattern for the eyes was adhered to the fabric in step one” … this is incorrect, the two pieces for each eye are assembled on the pressing sheet first.
Thank you for these tips. They were timed perfectly for my current project.
I’ve made this owl – what a *hoot*! ♥
Can it be used directly on a table surface?
Hi Kat, A pressing sheet is used on an ironing surface. Thanks, Betsey
Okay, thank you!