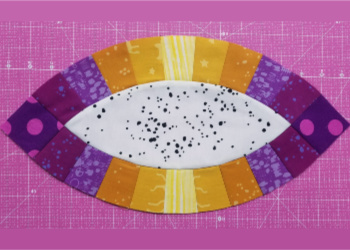
We’re approaching the end of the Paducah Sewalong: Double Wedding Ring Sampler. Once all 36 blocks are made, it’s time to put them together into a Double Wedding Ring! To help, we have a how-to for Double Wedding Ring assembly.
Making Rings
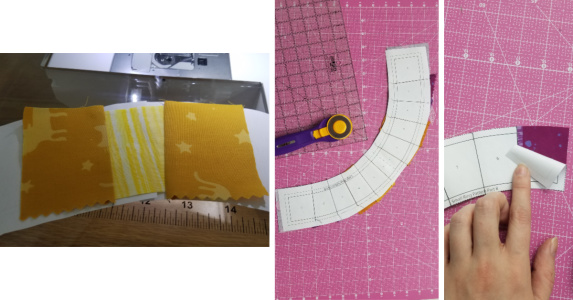
Download the Double Wedding Ring Templates & Patterns to begin. Assembly the rings using your preferred method: template or foundation paper pieced (FPP).
If you choose FPP, assemble following the numerical order on the pattern, trimming seam allowances as you go. A little glue to lightly hold the fabric to the paper after pressing can be really helpful and negate the need for pinning.
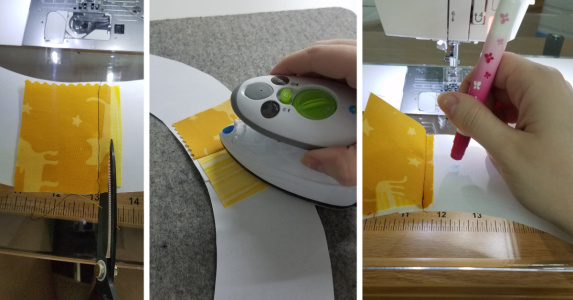
Once the ring is all sewn, trim the excess even to the checked cut line using scissors or a small, sharp rotary cutter. Once trimmed, rip off the paper back to prepare for curved piecing.
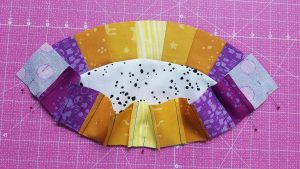
Making Melons
Follow along with the step-by-step images below.

Fold the melon (white piece), and small ring in half and press a light crease to mark the center.

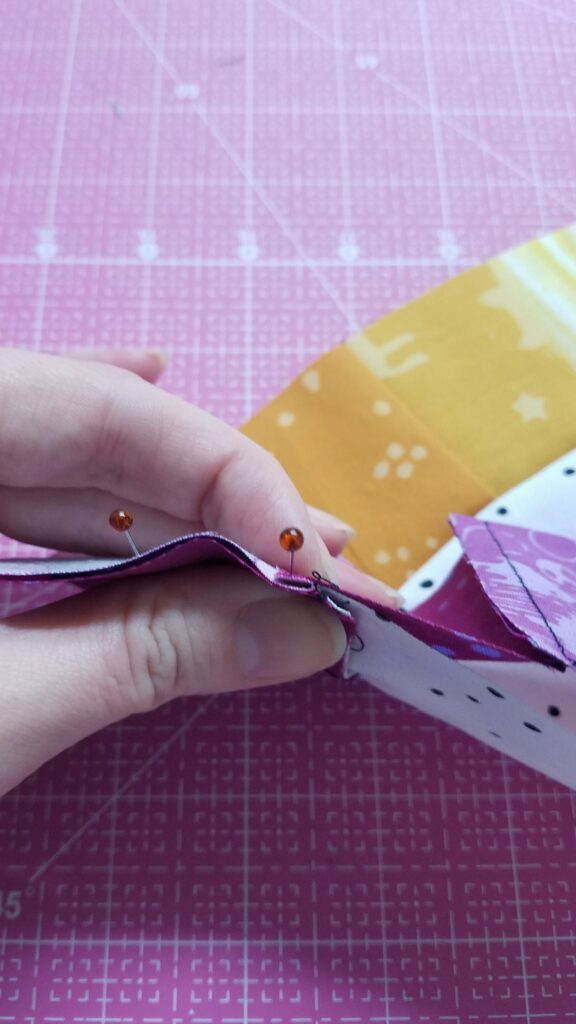
Right sides together, line the center of the ring and the melon together and pin as shown.

Pull the ring end to the point of the melon and pin so its even.

Check that it is even from the back to ensure accuracy. Repeat at the other end.

A pin in the center and at each end are all that are required, but you can also pin in between these points. Over-pinning is tempting with curved piecing, but the fabric actually has an easier time if it has the freedom to “give” while sewing.
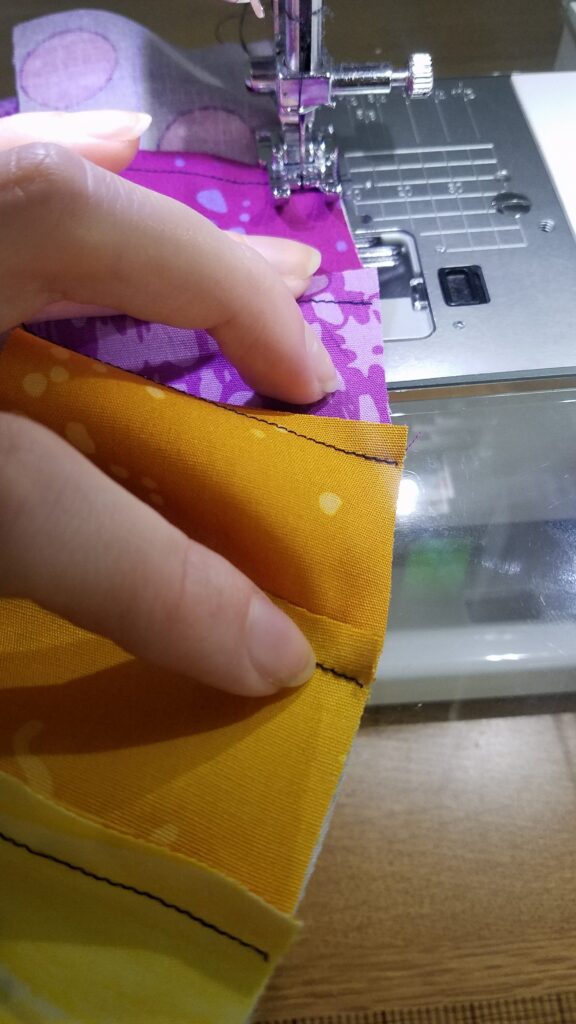
If your sewing machine has the following features, consider making these adjustments for an easier time. Slow the speed setting down all the way. Set the needle to end in the down position. Reduce the stitch width to approximately 1.8 millimeters.
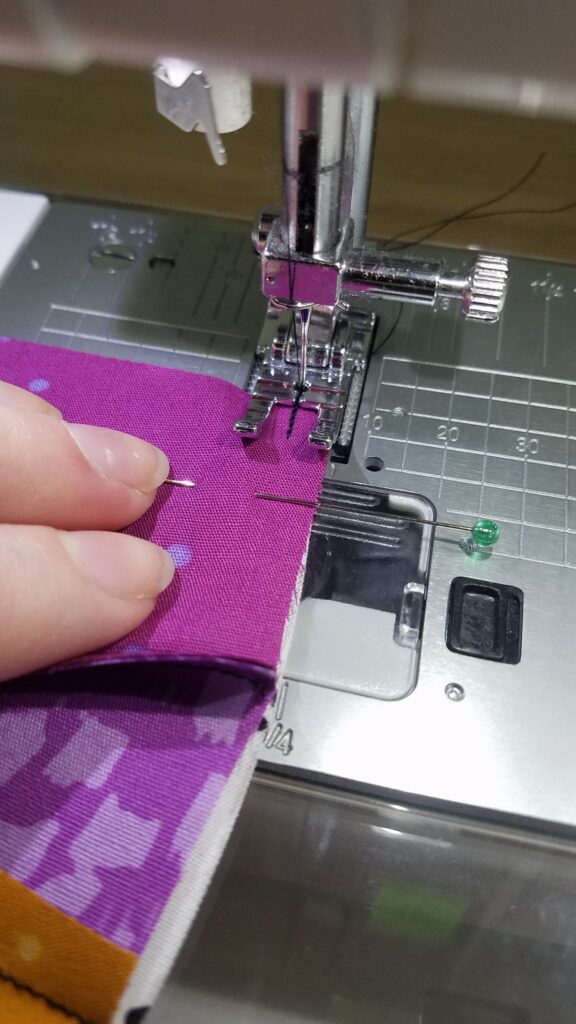
With the ring facing up, start sewing about half an inch from the end, using a 1/4″ seam. Backstitch off the edge, and then continue sewing. We are using a bladeless quarter inch foot in this photo and it’s proven to be our favorite foot for curved piecing.
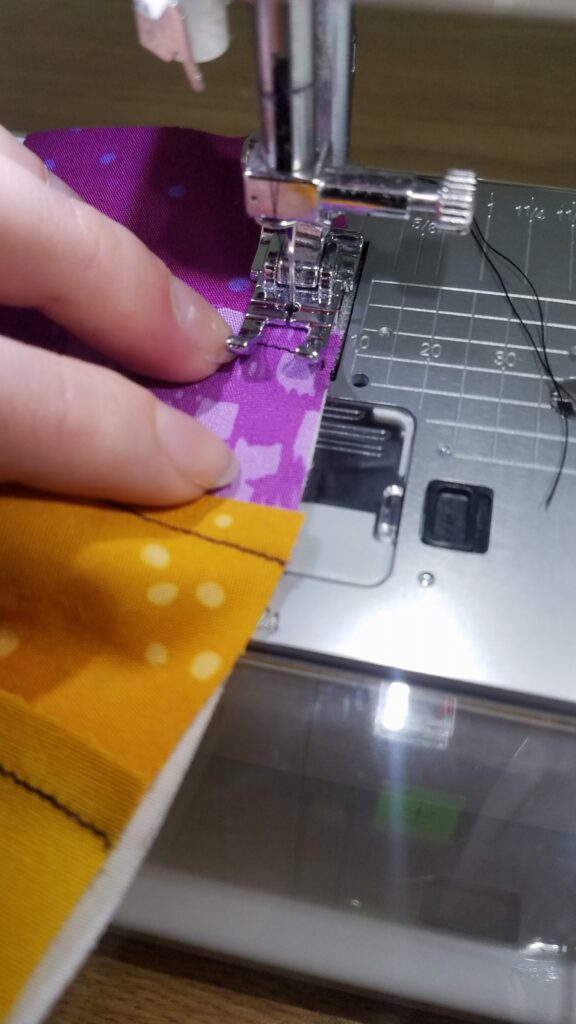
Gently manipulate the fabric while sewing so the ring and melon edges are perfectly aligned as they go under the foot. Don’t be alarmed if the seam allowances in the ring poke out, it’s all part of the fabric shifting and finding its way in this curved seam.
Backstitch at the end of the seam like we did at the beginning.
Check your seam allowance at this point for any sizing issues or sharp pivots that will affect the curve of the seam.

Once satisfied, press the seam towards the melon, first with your fingers, and then a light press with the iron. (Avoid tugging and pulling at the seam, especially when pressing.)
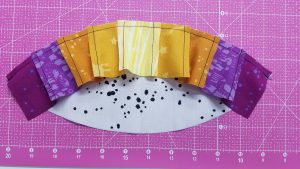
Take the large ring and pin it to the melon at the center point the same as we did for the small ring.
At the cornerstones of the large ring, lock seams with the melon to ensure sharp points.
Pin the same as the small ring. We’ve pinned the ends, the locked seams and the center. You can pin between the locked seam and the center, but we’ll show you a way of handling the fabric without extra pins in the next picture. The most important thing to us is that you do what’s comfortable for you and makes you feel confident.
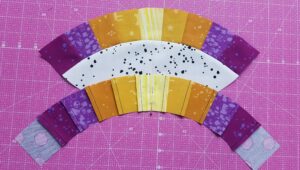
Start sewing the large ring the same as the small ring, securing with backstitches and so on.
Sew past the first cornerstone, removing pins as you go. This is a way of holding the ring from the locked cornerstone seam all the way to the center pin. Minimal pinning let us take advantage of the “give” in the ring. Plus, we were able to feel how everything was fitting together as we sewed.
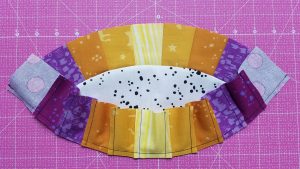
Check your seam allowance at this point for any sizing issues or sharp pivots that will affect the curve of the seam. Pay special attention to the cornerstones to make sure the points matched.
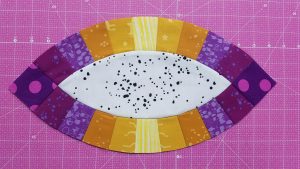
Press the seam towards the melon to complete the melon and ring assembly.
Sampler Double Wedding Ring Centers
Download the Double Wedding Ring Templates & Patterns to begin.
Sew a background 4 1/2″ x 7″ rectangle to each side of a completed 6 1/2″ x 6 1/2″ Sampler block. Trim the rectangles to match the block.

Sew a background 4 1/2″ x 14 1/2″ rectangle to the top and bottom of the block with side frames.

Trace the center template onto freezer paper and adhere the freezer paper to the back of the framed block. This gives you a chance to make sure the block is centered in the template before cutting. Leave the freezer paper in place and do not cut out the shape until you’re ready to sew the center to the melons.
Tips:
* Mark a 1/4″ from the ends and sides of the corners of the framed center with a dot. Use this as the starting and stopping point for joining the center to the melons.
* Sew with the melons on bottom and the center on top.
* Once you are joining the melons to the centers, finger press. No need to iron at this point.
* Take it easy as you work with curves. You’ll get a rhythm that works for you. If you get frustrated, take a break and come back fresh.
Sewing Rows Together
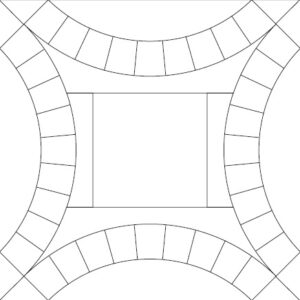
Double Wedding Ring quilts are sewn in rows with curved seams. This is great because it totally avoids Y-seams.
Using the diagram below, lay out the sampler centers and melons and sew together in rows. Sew the rows together to complete the Double Wedding Ring Sampler.

Show off your progress, connect with other quilters, get ideas, motivation and more!
Join us in the AQS Project Parade Facebook Group and piece along with us!
Members get even more…
Not a member? Join today!
0 Comments for “Double Wedding Ring 101”