Electric Quilt 8 (EQ8, to its friends, which you are about to become) enables quilters to design most anything they can imagine. Designing your first quilt using any program can take some trial and error, but with step-by-step guide, you’ll design your first quilt in no time. Use this as a starting point and practice for all the other wonderful quilts you’d like to make!
Don’t have EQ8? Get it here!
Click to enlarge the images.
Block Worktable Set Up

1. Open EQ8 and click “Design a block from scratch” to start.

2. EQ8 will open the Block Worktable on the New Block tab where you can select a style of block and a style of how to draw the block. We’re going to make a pieced block using EasyDraw by clicking on it.

3. EQ8 will open the Draw tab. Above the drawing area are fields that set the block size, snap points that lines will snap to while drawing, and a grid. Type “12” into the Block Width and Block Height fields, Set the Horizontal and Vertical Snaps to “24” and the Graph Paper Cells to “12” to create a 12″ block with 1/2″ snap increments and a 1″ grid as a guide.
Click the Line Tool in the area to the left to prepare to draw.
Block Design in EQ8

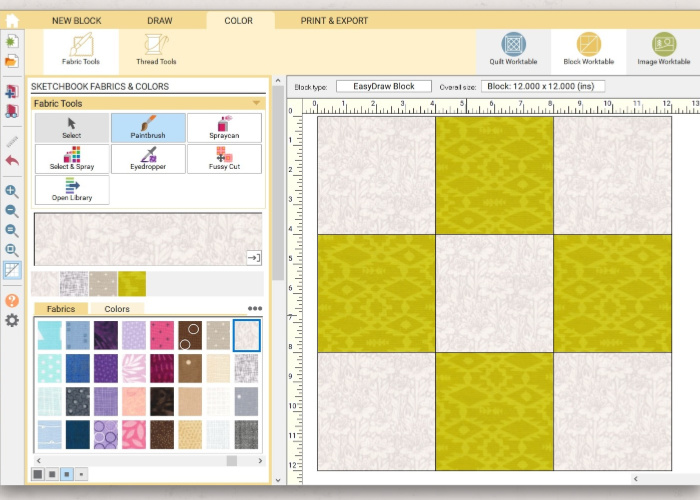
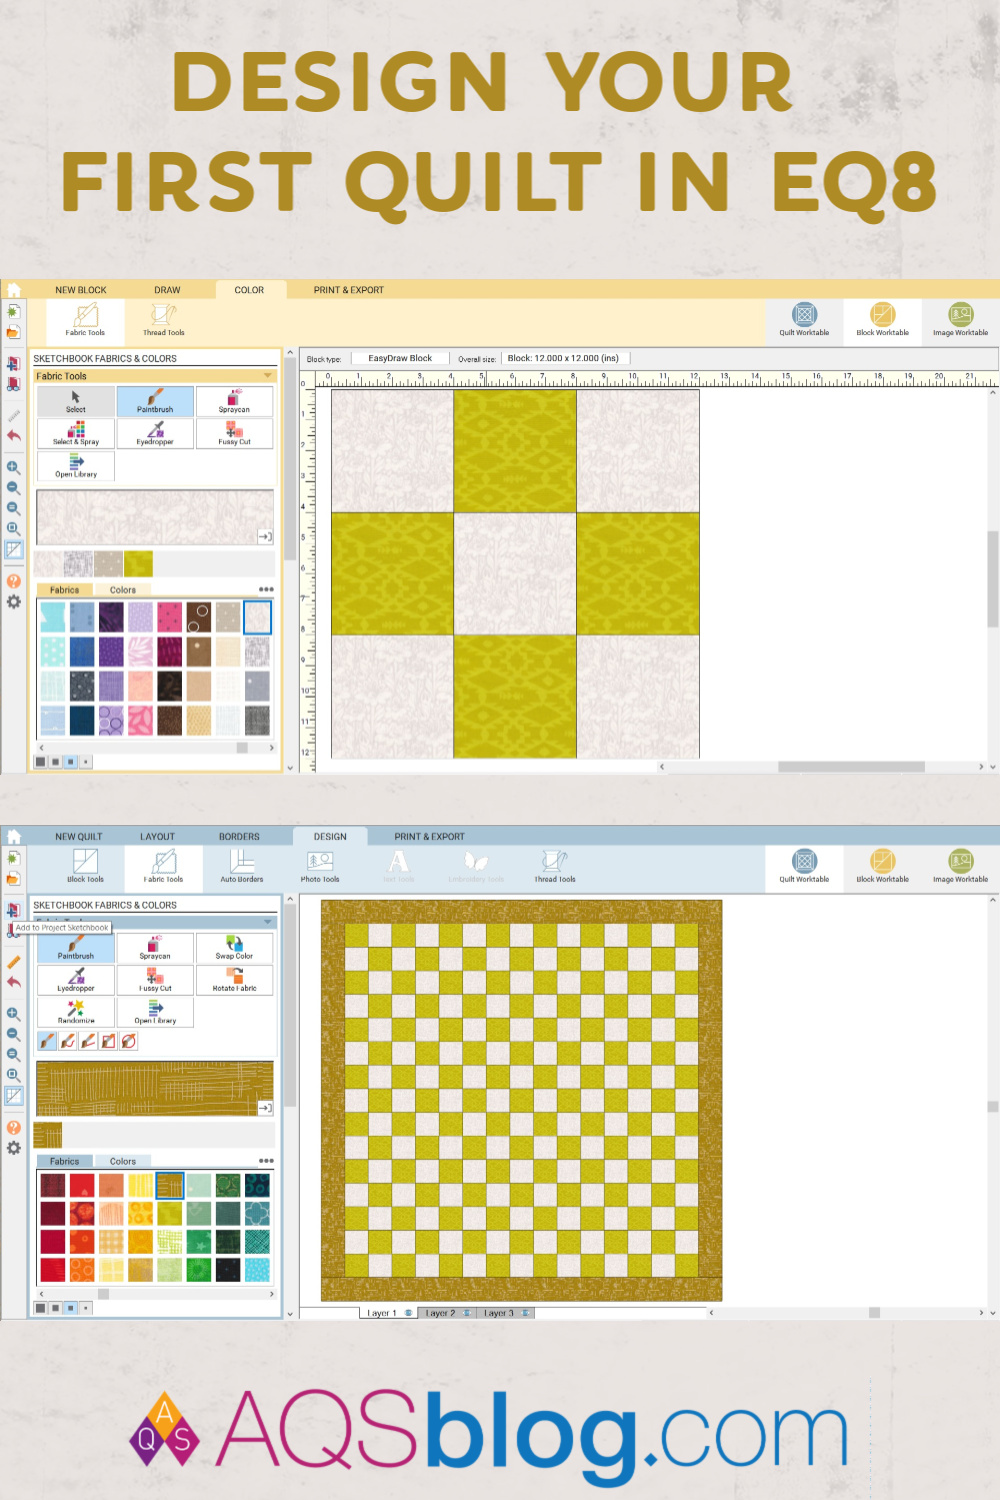
4. Click and hold, drag from one point to the next point, and release to draw a line. We’re going to draw an equal nine-patch, so draw lines from edge-to-edge 4″ (4 grid squares) apart.

5. After drawing all the lines, click the Color tab. EQ8 will open to Fabric Tools. Click the Paint Brush tool to color one patch at a time. Then select a swatch from the Fabrics tab or a color from the Colors tap below the tools by clicking on the one you want.

6. Click on a patch to color it with the fabric or color of your choice. Select a different fabric and keep coloring!

7. When the block looks like you want, add it to the Project Sketchbook by clicking the icon that looks like a book with a plus sign located on the sidebar menu to the left.

8. In a new project, adding to the sketchbook will prompt you to save the project. Follow the prompt instructions to save.

9. You can recolor the same block a different way and add it to the Project Sketchbook as well.
When you are done making blocks, click on the Quilt Worktable to the upper right to switch worktable screens.
Quilt Worktable Set Up

10. EQ8 will open the New Quilt tab and automatically display the Horizontal (aka Straight Set) style quilt. We will stick to this style for this quilt.

11. Click the Layout tab. In the Horizontal Layout menu, there are fields to set the number of blocks, block size, and even sashing. Set the number of blocks to 5 for Horizontal and Vertical. Check the “Keep width and height equal” box and then set the block size to 12.

12. Click the Borders tab. EQ8 automatically selects the Long Horizontal style borders. We will use them for this quilt.
In the Border Options menu, you can add and delete borders, adjust the size and style of the selected borders. Change the border size to 4 in the size fields.
Quilt Design in EQ8

13. Click the Design tab. It will open Block Tools which show the blocks saved in the Project Sketchbook.
EQ8 automatically places several blocks in every Project Sketchbook. You can delete them, edit them, and use them.
Click on the Set Block tool, and then click the block you want to place in the quilt. Click on any patch in the quilt to set the block.

14. Notice how it looks like only one of the blocks I saved is in the sketchbook? This is because it was the same block with different colorings. I can toggle between the colorings, or I can split the colorings so both are visible at the same time.
To split the colorings, right click the block and select Split Colorings in the drop down menu.

15. Select the block you want and click on any remaining empty patches.

16. Click on the Fabric Tools in the top ribbon, and then select the Paintbrush tool and choose a fabric you want to use. Click on any patch to color it with your selected fabric or color.

17. When the quilt is colored like you want, add it to the Project Sketchbook to save. You can then recolor or even start a new quilt.

18. To view the quilts you’ve saved, click on the icon that looks like a book and glasses in the left sidebar menu. This opens the Project Sketchbook. Click Quilts in the menu to view your creations.
Keep Learning!
Pin the image to Pinterest above so you never lose this tutorial.
Do you want to get started with EQ Mini? Click Here for a tutorial on building a quilt!
Want to make a two-block quilt using blocks from the Block Library in EQ8? Click Here for a tutorial!
Don’t have EQ8, but you’re ready to take the jump? Get it here!
Now that you’ve design your first quilt, what else do you want to learn to design in EQ8? Leave it in the comments below!
Show off your creations, connect with other quilters, and get inspired!
Join us in the AQS Project Parade Facebook Group.
Members get even more…
AQS Members can access hundreds of patterns and digital issues of American Quilter at any time!
Find quilt along series like Forever & A Day, 30 Days of Birds and more.

Not a member? Join today!
0 Comments for “Design Your First Quilt in EQ8”